Der perfekte Server CentOS 7.4 mit Apache, Postfix, Dovecot, Pure-FTPD, BIND und ISPConfig 3.1
21 Roundcube Webmail installieren
Um den RoundCube Webmail-Client zu installieren, führen Sie…..
yum -y install roundcubemail
Ändern Sie die Konfigurationsdatei roundcubemail.conf wie folgt:
nano /etc/httpd/conf.d/roundcubemail.conf
#
# Round Cube Webmail is a browser-based multilingual IMAP client
#

Alias /roundcubemail /usr/share/roundcubemail
Alias /webmail /usr/share/roundcubemail

# Define who can access the Webmail
# You can enlarge permissions once configured

#<Directory /usr/share/roundcubemail/>
#    <IfModule mod_authz_core.c>
#        # Apache 2.4
#        Require local
#    </IfModule>
#    <IfModule !mod_authz_core.c>
#        # Apache 2.2
#        Order Deny,Allow
#        Deny from all
#        Allow from 127.0.0.1
#        Allow from ::1
#    </IfModule>
#</Directory>

<Directory /usr/share/roundcubemail/>
        Options none
        AllowOverride Limit
        Require all granted
</Directory>

# Define who can access the installer
# keep this secured once configured

#<Directory /usr/share/roundcubemail/installer/>
#    <IfModule mod_authz_core.c>
#        # Apache 2.4
#        Require local
#    </IfModule>
#    <IfModule !mod_authz_core.c>
#        # Apache 2.2
#        Order Deny,Allow
#        Deny from all
#        Allow from 127.0.0.1
#        Allow from ::1
#    </IfModule>
#</Directory>

<Directory /usr/share/roundcubemail/installer>
        Options none
        AllowOverride Limit
        Require all granted
</Directory>


# Those directories should not be viewed by Web clients.
<Directory /usr/share/roundcubemail/bin/>
    Order Allow,Deny
    Deny from all
</Directory>
<Directory /usr/share/roundcubemail/plugins/enigma/home/>
    Order Allow,Deny
    Deny from all
</Directory>
Starten Sie den Apache neu:
systemctl restart httpd.service
Jetzt brauchen wir eine Datenbank für RoundCube-Mail, wir werden sie wie folgt initialisieren:
mysql -u root -p
Bei MariaDB Eingabeaufforderung verwenden:
CREATE DATABASE roundcubedb;
CREATE USER roundcubeuser@localhost IDENTIFIED BY 'roundcubepassword';
GRANT ALL PRIVILEGES on roundcubedb.* to roundcubeuser@localhost ;
FLUSH PRIVILEGES;
exit
Ich benutze die Details für die RoundCube-Datenbank als Beispiel, bitte ersetzen Sie die Werte aus Sicherheitsgründen nach Ihrer Wahl.
Jetzt werden wir RoundCube im Browser unter http://192.168.0.100/roundcubemail/installer installieren.
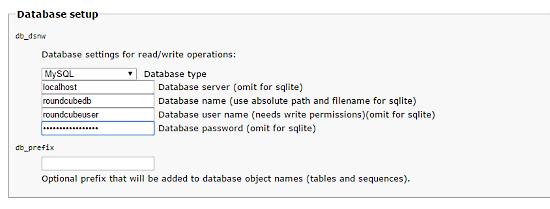
Füllen Sie nun die Einträge für die
nano /etc/roundcubemail/config.inc.php
<?php

/* Local configuration for Roundcube Webmail */

// ----------------------------------
// SQL DATABASE
// ----------------------------------
// Database connection string (DSN) for read+write operations
// Format (compatible with PEAR MDB2): db_provider://user:password@host/database
// Currently supported db_providers: mysql, pgsql, sqlite, mssql or sqlsrv
// For examples see http://pear.php.net/manual/en/package.database.mdb2.intro-dsn.php
// NOTE: for SQLite use absolute path: 'sqlite:////full/path/to/sqlite.db?mode=0646'
$config['db_dsnw'] = 'mysql://roundcubeuser:roundcubepassword@localhost/roundcubedb';

// ----------------------------------
// IMAP
// ----------------------------------
// The mail host chosen to perform the log-in.
// Leave blank to show a textbox at login, give a list of hosts
// to display a pulldown menu or set one host as string.
// To use SSL/TLS connection, enter hostname with prefix ssl:// or tls://
// Supported replacement variables:
// %n - hostname ($_SERVER['SERVER_NAME'])
// %t - hostname without the first part
// %d - domain (http hostname $_SERVER['HTTP_HOST'] without the first part)
// %s - domain name after the '@' from e-mail address provided at login screen
// For example %n = mail.domain.tld, %t = domain.tld
// WARNING: After hostname change update of mail_host column in users table is
//          required to match old user data records with the new host.
$config['default_host'] = 'localhost';

// provide an URL where a user can get support for this Roundcube installation
// PLEASE DO NOT LINK TO THE ROUNDCUBE.NET WEBSITE HERE!
$config['support_url'] = '';

// this key is used to encrypt the users imap password which is stored
// in the session record (and the client cookie if remember password is enabled).
// please provide a string of exactly 24 chars.
$config['des_key'] = 'FHgaM7ihtMkM1cBwckOcxPdT';

// ----------------------------------
// PLUGINS
// ----------------------------------
// List of active plugins (in plugins/ directory)
$config['plugins'] = array();

// Set the spell checking engine. Possible values:
// - 'googie'  - the default
// - 'pspell'  - requires the PHP Pspell module and aspell installed
// - 'enchant' - requires the PHP Enchant module
// - 'atd'     - install your own After the Deadline server or check with the people at http://www.afterthedeadline.com before using their API
// Since Google shut down their public spell checking service, you need to
// connect to a Nox Spell Server when using 'googie' here. Therefore specify the 'spellcheck_uri'
$config['spellcheck_engine'] = 'pspell';
Klicken Sie dann im Web-Installer auf „Weiter“. Klicken Sie auf der folgenden Seite auf die Schaltfläche „Datenbank initialisieren“.
Deaktivieren Sie abschließend das Roundecubemail-Installationsprogramm. Ändern Sie die Konfigurationsdatei apache roundcubemail.conf:
nano /etc/httpd/conf.d/roundcubemail.conf
#
# Round Cube Webmail is a browser-based multilingual IMAP client
#

Alias /roundcubemail /usr/share/roundcubemail
Alias /webmail /usr/share/roundcubemail

# Define who can access the Webmail
# You can enlarge permissions once configured

#<Directory /usr/share/roundcubemail/>
#    <IfModule mod_authz_core.c>
#        # Apache 2.4
#        Require local
#    </IfModule>
#    <IfModule !mod_authz_core.c>
#       # Apache 2.2
#        Order Deny,Allow
#        Deny from all
#        Allow from 127.0.0.1
#        Allow from ::1
#    </IfModule>
#</Directory>

<Directory /usr/share/roundcubemail/>
        Options none
        AllowOverride Limit
        Require all granted
</Directory>

# Define who can access the installer
# keep this secured once configured

<Directory /usr/share/roundcubemail/installer/>
    <IfModule mod_authz_core.c>
        # Apache 2.4
       Require local
   </IfModule>
    <IfModule !mod_authz_core.c>
        # Apache 2.2
        Order Deny,Allow
        Deny from all
       Allow from 127.0.0.1
        Allow from ::1
    </IfModule>
</Directory>

# Those directories should not be viewed by Web clients.
<Directory /usr/share/roundcubemail/bin/>
    Order Allow,Deny
    Deny from all
</Directory>
<Directory /usr/share/roundcubemail/plugins/enigma/home/>
    Order Allow,Deny
    Deny from all
</Directory>
Starten Sie den Apache neu:
systemctl restart httpd.service
22 ISPConfig 3.1 installieren
Das ISPConfig-Installationsprogramm konfiguriert alle Dienste wie Postfix, Dovecot, etc. für Sie.
Sie haben nun auch die Möglichkeit, vom Installer einen SSL-Vhost für das ISPConfig-Control Panel erstellen zu lassen, so dass ISPConfig über https:// statt über http://. erreichbar ist. Um dies zu erreichen, drücken Sie einfach ENTER, wenn Sie diese Frage sehen: Möchten Sie eine sichere (SSL-)Verbindung zum ISPConfig Webinterface (y,n)[y]:.
Um ISPConfig 3.1 aus dem GIT stable branch zu installieren, gehen Sie wie folgt vor:
cd /tmp
wget -O ispconfig.tar.gz https://git.ispconfig.org/ispconfig/ispconfig3/repository/archive.tar.gz?ref=stable-3.1
tar xfz ispconfig.tar.gz
cd ispconfig3*/install/
Der nächste Schritt ist die Ausführung:
php -q install.php
Dadurch wird das Installationsprogramm von ISPConfig 3 gestartet. Der Installer konfiguriert alle Dienste wie Postfix, Dovecot, etc. für Sie. Eine manuelle Einrichtung, wie sie für ISPConfig 2 (Perfect Setup Guides) erforderlich ist, ist nicht erforderlich.
# php -q install.php
--------------------------------------------------------------------------------
_____ ___________ _____ __ _ ____
|_ _/ ___| ___ \ / __ \ / _(_) /__ \
| | \ `--.| |_/ / | / \/ ___ _ __ | |_ _ __ _ _/ /
| | `--. \ __/ | | / _ \| '_ \| _| |/ _` | |_ |
_| |_/\__/ / | | \__/\ (_) | | | | | | | (_| | ___\ \
\___/\____/\_| \____/\___/|_| |_|_| |_|\__, | \____/
__/ |
|___/
--------------------------------------------------------------------------------
>> Initial configuration
Operating System: CentOS 7.4
Following will be a few questions for primary configuration so be careful.
Default values are in [brackets] and can be accepted with <ENTER>.
Tap in "quit" (without the quotes) to stop the installer.
Select language (en,de) [en]: <-- Hit Enter
Installation mode (standard,expert) [standard]: <-- Hit Enter
Full qualified hostname (FQDN) of the server, eg server1.domain.tld [server1.canomi.com]: <-- Hit Enter
MySQL server hostname [localhost]: <-- Hit Enter
MySQL server port [3306]: <-- Hit Enter
MySQL root username [root]: <-- Hit Enter
MySQL root password []: <-- Enter your MySQL root password
MySQL database to create [dbispconfig]: <-- Hit Enter
MySQL charset [utf8]: <-- Hit Enter
Configuring Postgrey
Configuring Postfix
Generating a 4096 bit RSA private key
.......................................................................++
........................................................................................................................................++
writing new private key to 'smtpd.key'
-----
You are about to be asked to enter information that will be incorporated
into your certificate request.
What you are about to enter is what is called a Distinguished Name or a DN.
There are quite a few fields but you can leave some blank
For some fields there will be a default value,
If you enter '.', the field will be left blank.
-----
Country Name (2 letter code) [AU]: <-- Enter 2 letter country code
State or Province Name (full name) [Some-State]: <-- Enter the name of the  state
Locality Name (eg, city) []: <-- Enter your city
Organization Name (eg, company) [Internet Widgits Pty Ltd]: <-- Enter company name or press enter
Organizational Unit Name (eg, section) []: <-- Hit Enter
Common Name (e.g. server FQDN or YOUR name) []: <-- Enter the server hostname, in my case: server1.example.com
Email Address []: <-- Hit Enter
Configuring Mailman
Configuring Dovecot
Configuring Spamassassin
Configuring Amavisd
Configuring Getmail
Configuring BIND
Configuring Jailkit
Configuring Pureftpd
Configuring Apache
Configuring vlogger
Configuring Bastille Firewall
Configuring Fail2ban
[INFO] service OpenVZ not detected
Configuring Apps vhost
Installing ISPConfig
ISPConfig Port [8080]:
Admin password [admin]:
Do you want a secure (SSL) connection to the ISPConfig web interface (y,n) [y]: <-- Hit Enter
Generating RSA private key, 4096 bit long modulus
.......................++
................................................................................................................................++
e is 65537 (0x10001)
You are about to be asked to enter information that will be incorporated
into your certificate request.
What you are about to enter is what is called a Distinguished Name or a DN.
There are quite a few fields but you can leave some blank
For some fields there will be a default value,
If you enter '.', the field will be left blank.
-----
Country Name (2 letter code) [AU]: <-- Enter 2 letter country code
State or Province Name (full name) [Some-State]: <-- Enter the name of the  state
Locality Name (eg, city) []: <-- Enter your city
Organization Name (eg, company) [Internet Widgits Pty Ltd]: <-- Enter company name or press enter
Organizational Unit Name (eg, section) []: <-- Hit Enter
Common Name (e.g. server FQDN or YOUR name) []: <-- Enter the server hostname, in my case: server1.example.com
Email Address []: <-- Hit Enter
Please enter the following 'extra' attributes
to be sent with your certificate request
A challenge password []: <-- Hit Enter
An optional company name []: <-- Hit Enter
writing RSA key
Configuring DBServer
Installing ISPConfig crontab
no crontab for root
no crontab for getmail
Detect IP addresses
Restarting services ...
Installation completed.
Das Installationsprogramm konfiguriert automatisch alle zugrunde liegenden Dienste, so dass keine manuelle Konfiguration erforderlich ist.
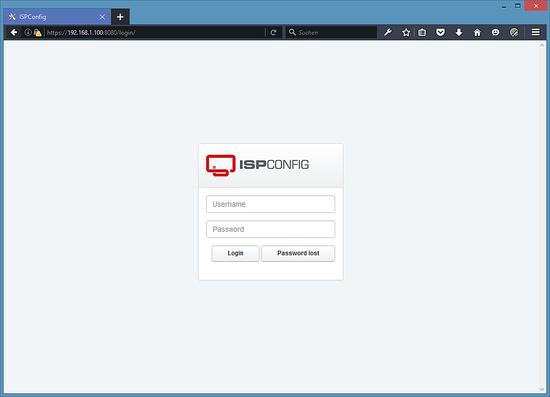
23 Erste ISPConfig-Anmeldung
Danach können Sie auf ISPConfig 3 unter http(s)://server1.example.com:8080/ oder http(s)://192.168.0.100:8080/ zugreifen (http oder https abhängig davon, was Sie bei der Installation gewählt haben).
Melden Sie sich mit dem Benutzernamen admin und dem Passwort admin an (Sie sollten das Standardpasswort nach Ihrer ersten Anmeldung ändern):
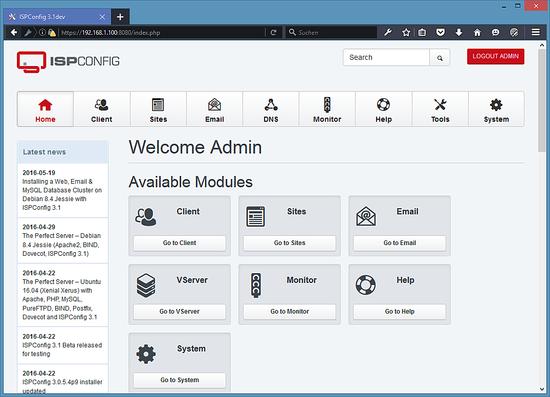
23.1 Das ISPConfig 3 Handbuch
Um die Bedienung von ISPConfig 3 zu erlernen, empfehle ich dringend, das ISPConfig 3 Handbuch herunterzuladen.
Auf mehr als 300 Seiten wird das Konzept von ISPConfig (Admin, Reseller, Clients) behandelt, die Installation und Aktualisierung von ISPConfig 3 erklärt, eine Referenz für alle Formulare und Formularfelder in ISPConfig sowie Beispiele für gültige Eingaben enthalten und Tutorials für die häufigsten Aufgaben in ISPConfig 3 bereitgestellt. Es beschreibt auch, wie Sie Ihren Server sicherer machen können und enthält am Ende einen Abschnitt zur Fehlerbehebung.
24 Links
- CentOS: http://www.centos.org/
- ISPConfig: http://www.ispconfig.org/