Der perfekte Server – Ubuntu 18.04 (Bionic Beaver) mit Apache, PHP, MySQL, PureFTPD, BIND, Postfix, Dovecot und ISPConfig 3.1
16. Roundcube Webmail installieren
Um Roundcube Webmail zu installieren, führen Sie:
apt-get -y install roundcube roundcube-core roundcube-mysql roundcube-plugins javascript-common libjs-jquery-mousewheel php-net-sieve tinymce
Der Installateur wird die folgenden Fragen stellen:
Configure database for roundcube with dbconfig-common? <-- Yes
MySQL application password for roundcube: <-- Press enter
Bearbeiten Sie dann die RoundCube Apache Konfigurationsdatei.
nano /etc/apache2/conf-enabled/roundcube.conf
und entfernen Sie das # vor der Alias-Zeile, dann fügen Sie die zweite Alias-Zeile für /webmail hinzu und fügen Sie die Zeile „AddType application/x-httpd-php.php“ direkt nach der Zeile „<Directory /var/lib/roundcube>“ hinzu:
# Those aliases do not work properly with several hosts on your apache server
# Uncomment them to use it or adapt them to your configuration
Alias /roundcube /var/lib/roundcube
Alias /webmail /var/lib/roundcube
[...]
<Directory /var/lib/roundcube>
AddType application/x-httpd-php .php
[...]
Und starten Sie den Apache neu.
service apache2 restart
Bearbeiten Sie dann die Konfigurationsdatei RoundCube config.inc.php:
nano /etc/roundcube/config.inc.php
und ändern Sie den Standardhost auf localhost:
$config['default_host'] = 'localhost';
Dadurch wird verhindert, dass Roundcube im Anmeldeformular das Eingabefeld für den Servernamen anzeigt.
17. ISPConfig 3.1 installieren
Um ISPConfig 3 von der neuesten freigegebenen Version zu installieren, gehen Sie wie folgt vor:
cd /tmp
wget -O ispconfig.tar.gz https://git.ispconfig.org/ispconfig/ispconfig3/repository/archive.tar.gz?ref=stable-3.1
tar xfz ispconfig.tar.gz
cd ispconfig3*/install/
Der nächste Schritt ist die Ausführung von
php -q install.php
Dadurch wird das Installationsprogramm von ISPConfig 3 gestartet. Der Installer konfiguriert alle Dienste wie Postfix, Dovecot, etc. für Sie.
# php -q install.php
--------------------------------------------------------------------------------
_____ ___________ _____ __ _ ____
|_ _/ ___| ___ \ / __ \ / _(_) /__ \
| | \ `--.| |_/ / | / \/ ___ _ __ | |_ _ __ _ _/ /
| | `--. \ __/ | | / _ \| '_ \| _| |/ _` | |_ |
_| |_/\__/ / | | \__/\ (_) | | | | | | | (_| | ___\ \
\___/\____/\_| \____/\___/|_| |_|_| |_|\__, | \____/
__/ |
|___/
--------------------------------------------------------------------------------
>> Initial configuration
Operating System: Ubuntu 18.04 (Bionic Beaver)
Following will be a few questions for primary configuration so be careful.
Default values are in [brackets] and can be accepted with <ENTER>.
Tap in "quit" (without the quotes) to stop the installer.
Select language (en,de) [en]: <-- Hit Enter
Installation mode (standard,expert) [standard]: <-- Hit Enter
Full qualified hostname (FQDN) of the server, eg server1.domain.tld [server1.canomi.com]: <-- Hit Enter
MySQL server hostname [localhost]: <-- Hit Enter
MySQL server port [3306]: <-- Hit Enter
MySQL root username [root]: <-- Hit Enter
MySQL root password []: <-- Enter your MySQL root password
MySQL database to create [dbispconfig]: <-- Hit Enter
MySQL charset [utf8]: <-- Hit Enter
Configuring Postgrey
Configuring Postfix
Generating a 4096 bit RSA private key
.......................................................................++
........................................................................................................................................++
writing new private key to 'smtpd.key'
-----
You are about to be asked to enter information that will be incorporated
into your certificate request.
What you are about to enter is what is called a Distinguished Name or a DN.
There are quite a few fields but you can leave some blank
For some fields there will be a default value,
If you enter '.', the field will be left blank.
-----
Country Name (2 letter code) [AU]: <-- Enter 2 letter country code
State or Province Name (full name) [Some-State]: <-- Enter the name of the  state
Locality Name (eg, city) []: <-- Enter your city
Organization Name (eg, company) [Internet Widgits Pty Ltd]: <-- Enter company name or press enter
Organizational Unit Name (eg, section) []: <-- Hit Enter
Common Name (e.g. server FQDN or YOUR name) []: <-- Enter the server hostname, in my case: server1.example.com
Email Address []: <-- Hit Enter
Configuring Mailman
Configuring Dovecot
Configuring Spamassassin
Configuring Amavisd
Configuring Getmail
Configuring BIND
Configuring Jailkit
Configuring Pureftpd
Configuring Apache
Configuring vlogger
Configuring Metronome XMPP Server
writing new private key to 'localhost.key'
-----
Country Name (2 letter code) [AU]: <-- Enter 2 letter country code
Locality Name (eg, city) []: <-- Enter your city
Organization Name (eg, company) [Internet Widgits Pty Ltd]: <-- Enter company name or press enter
Organizational Unit Name (eg, section) []: <-- Hit Enter
Common Name (e.g. server FQDN or YOUR name) [server1.canomi.com]: <-- Enter the server hostname, in my case: server1.example.com
Email Address []: <-- Hit Enter
Configuring Ubuntu Firewall
Configuring Fail2ban
[INFO] service OpenVZ not detected
Configuring Apps vhost
Installing ISPConfig
ISPConfig Port [8080]:
Admin password [admin]:
Do you want a secure (SSL) connection to the ISPConfig web interface (y,n) [y]: <-- Hit Enter
Generating RSA private key, 4096 bit long modulus
.......................++
................................................................................................................................++
e is 65537 (0x10001)
You are about to be asked to enter information that will be incorporated
into your certificate request.
What you are about to enter is what is called a Distinguished Name or a DN.
There are quite a few fields but you can leave some blank
For some fields there will be a default value,
If you enter '.', the field will be left blank.
-----
Country Name (2 letter code) [AU]: <-- Enter 2 letter country code
State or Province Name (full name) [Some-State]: <-- Enter the name of the  state
Locality Name (eg, city) []: <-- Enter your city
Organization Name (eg, company) [Internet Widgits Pty Ltd]: <-- Enter company name or press enter
Organizational Unit Name (eg, section) []: <-- Hit Enter
Common Name (e.g. server FQDN or YOUR name) []: <-- Enter the server hostname, in my case: server1.example.com
Email Address []: <-- Hit Enter
Please enter the following 'extra' attributes
to be sent with your certificate request
A challenge password []: <-- Hit Enter
An optional company name []: <-- Hit Enter
writing RSA key
Configuring DBServer
Installing ISPConfig crontab
no crontab for root
no crontab for getmail
Detect IP addresses
Restarting services ...
Installation completed.
Das Installationsprogramm konfiguriert automatisch alle zugrunde liegenden Dienste, so dass keine manuelle Konfiguration erforderlich ist.
Danach können Sie auf ISPConfig 3 unter http(s)://server1.example.com:8080/ oder http(s)://192.168.0.100:8080/ zugreifen (HTTP oder HTTPS hängt davon ab, was Sie bei der Installation gewählt haben). Melden Sie sich mit dem Benutzernamen admin und dem Passwort admin an (Sie sollten das Standardpasswort nach Ihrer ersten Anmeldung ändern):

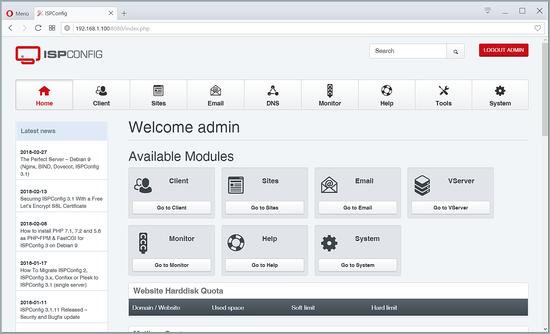
Das System ist nun einsatzbereit.
18. Links
- Ubuntu: http://www.ubuntu.com/
- ISPConfig: http://www.ispconfig.org/