Installation von Mastodon Social Network auf Ubuntu 22.04
Mastodon ist eine kostenlose und quelloffene Software zum Betreiben selbst gehosteter sozialer Netzwerkdienste und eine Twitter Alternative. Sie bietet Microblogging-Funktionen, mit denen du anderen Nutzern folgen und Nachrichten und Bilder mit Mastodon posten kannst. Die Platform ist in Ruby und JavaScript geschrieben und unterstützt Audio-, Video- und Bildbeiträge, Zugangsbeschreibungen, Umfragen, Inhaltswarnungen, animierte Avatare, benutzerdefinierte Emojis und mehr. Mastodon bietet eine Anwendung für verschiedene Plattformen wie Android und iOS.
In diesem Tutorial zeigen wir dir, wie du Mastodon auf Ubuntu 22.04 installierst. Für ältere Ubuntu Versionen wie Ubuntu 18.04 findest Du eine Anleitung hier.
Voraussetzungen
- Ein Server, auf dem Ubuntu 22.04 läuft.
- Ein Root-Passwort ist auf deinem Server eingerichtet.
- Ein gültiger Domainname ist auf die IP-Adresse deines Servers verweist.
Erste Schritte
Zuerst solltest du alle Systempakete auf die neueste Version aktualisieren. Das kannst du tun, indem du den folgenden Befehl ausführst:
apt-get update -y
apt-get upgrade -y
Nachdem du dein System aktualisiert hast, musst du einige Abhängigkeiten installieren, die Mastodon benötigt. Du kannst sie alle mit dem folgenden Befehl installieren:
apt-get install software-properties-common dirmngr apt-transport-https ca-certificates redis-server curl gcc g++ make imagemagick ffmpeg libpq-dev libxml2-dev libxslt1-dev file git-core libprotobuf-dev protobuf-compiler pkg-config autoconf bison build-essential libssl-dev libyaml-dev libreadline-dev libidn11-dev libicu-dev libjemalloc-dev zlib1g-dev libncurses5-dev libffi-dev libgdbm-dev -y
Sobald alle Abhängigkeiten installiert sind, kannst du mit dem nächsten Schritt fortfahren.
Node.js installieren
Für Mastodon muss Node.js auf deinem System installiert sein. Um Node.js zu installieren, füge das Node.js-Repository mit folgendem Befehl zu deinem Server hinzu:
curl -sL https://deb.nodesource.com/setup_16.x | bash -
Sobald das Repository hinzugefügt wurde, installiere Node.js Version 16 mit dem folgenden Befehl:
apt-get install nodejs -y
Als nächstes lädst du den GPG-Schlüssel von Yarn herunter, fügst ihn hinzu und aktivierst das Repository mit dem folgenden Befehl:
curl -sL https://dl.yarnpkg.com/debian/pubkey.gpg | apt-key add -
echo "deb https://dl.yarnpkg.com/debian/ stable main" | tee /etc/apt/sources.list.d/yarn.list
Sobald es hinzugefügt ist, aktualisiere das Repository und installiere Yarn mit den folgenden Befehlen auf unserem Node:
apt-get update -y
apt-get install yarn -y
Wenn du damit fertig bist, kannst du mit dem nächsten Schritt fortfahren.
PostgreSQL installieren und konfigurieren
Mastodon verwendet PostgreSQL als Datenbank-Backend. Du kannst die neueste Version von PostgreSQL mit dem folgenden Befehl installieren:
apt-get install postgresql postgresql-contrib -y
Nach der Installation meldest du dich mit folgendem Befehl bei PostgreSQL an:
su - postgres
postgres@debian:~$ psql
Als Nächstes erstellst du einen Benutzer für Mastodon mit dem folgenden Befehl:
postgres=# CREATE USER mastodon CREATEDB;
Verlasse die PostgreSQL-Shell mit folgendem Befehl:
postgres=#exit
Ruby installieren
Mastodon verwendet Ruby on Rails für das Backend. Zuerst musst du einen neuen Systembenutzer anlegen, um den Mastodon-Server zu betreiben.
Du kannst ihn mit dem folgenden Befehl erstellen:
adduser --disabled-login --gecos 'Mastodon Server' mastodon
Sobald er erstellt ist, melde dich mit folgendem Befehl beim Benutzer mastodon an:
su - mastodon
Als Nächstes klonst du das rbenv-Repository mit dem folgenden Befehl:
git clone https://github.com/rbenv/rbenv.git ~/.rbenv
Als Nächstes richtest du rbenv und ruby-build mit den folgenden Befehlen ein:
cd ~/.rbenv && src/configure && make -C src
echo 'export PATH="$HOME/.rbenv/bin:$PATH"' >> ~/.bashrc
echo 'eval "$(rbenv init -)"' >> ~/.bashrc
exec bash
git clone https://github.com/rbenv/ruby-build.git ~/.rbenv/plugins/ruby-build
Wenn du damit fertig bist, installiere die neueste Version von Ruby mit dem folgenden Befehl:
RUBY_CONFIGURE_OPTS=--with-jemalloc rbenv install 3.0.3
Nach der Installation solltest du die folgende Ausgabe erhalten:
Downloading ruby-3.0.3.tar.gz...
-> https://cache.ruby-lang.org/pub/ruby/3.0/ruby-3.0.3.tar.gz
Installing ruby-3.0.3...
Als Nächstes stellst du Ruby mit dem folgenden Befehl global zur Verfügung:
rbenv global 3.0.3
Als Nächstes aktualisierst du den Gem und installierst Bundler mit dem folgenden Befehl:
gem update --system
gem install bundler --no-document
Wenn du damit fertig bist, kannst du den Ruby mit dem folgenden Befehl überprüfen:
ruby --version
ruby 3.0.3p157 (2021-11-24 revision 3fb7d2cadc) [x86_64-linux]
Mastodon konfigurieren
Melde dich zunächst als Mastodon-Benutzer an und lade das Mastodon-Git-Repository mit dem folgenden Befehl herunter:
su - mastodon
git clone https://github.com/tootsuite/mastodon.git ~/live
cd ~/live
Als Nächstes checkst du den neuesten Zweig mit dem folgenden Befehl aus:
git checkout $(git tag -l | grep -v 'rc[0-9]*$' | sort -V | tail -n 1)
Du solltest die folgende Ausgabe erhalten:
Note: switching to 'v3.5.3'.

You are in 'detached HEAD' state. You can look around, make experimental
changes and commit them, and you can discard any commits you make in this
state without impacting any branches by switching back to a branch.

If you want to create a new branch to retain commits you create, you may
do so (now or later) by using -c with the switch command. Example:

  git switch -c

Or undo this operation with:

  git switch -

Turn off this advice by setting config variable advice.detachedHead to false

HEAD is now at fbcbf7898 Bump version to 3.5.3 (#18530)
Als Nächstes installierst du alle Abhängigkeiten mit dem folgenden Befehl:
bundle config deployment 'true'
bundle config without 'development test'
bundle install -j$(getconf _NPROCESSORS_ONLN)
yarn install --pure-lockfile
Richte nun Mastodon mit dem folgenden Befehl ein:
RAILS_ENV=production bundle exec rake mastodon:setup
Während des Installationsprozesses werden dir mehrere Fragen gestellt. Beantworte alle Fragen wie unten gezeigt:
Your instance is identified by its domain name. Changing it afterward will break things.
Domain name: mastodon.example.com

Single user mode disables registrations and redirects the landing page to your public profile.
Do you want to enable single user mode? No

Are you using Docker to run Mastodon? no

PostgreSQL host: /var/run/postgresql
PostgreSQL port: 5432
Name of PostgreSQL database: mastodon_production
Name of PostgreSQL user: mastodon
Password of PostgreSQL user:
Database configuration works! ????

Redis host: localhost
Redis port: 6379
Redis password:
Redis configuration works! ????

Do you want to store uploaded files on the cloud? No

Do you want to send e-mails from localhost? yes
E-mail address to send e-mails "from": Mastodon <notifications@mastodon.example.com>
Send a test e-mail with this configuration right now? no

This configuration will be written to .env.production
Save configuration? Yes

Now that configuration is saved, the database schema must be loaded.
If the database already exists, this will erase its contents.
Prepare the database now? Yes

All done! You can now power on the Mastodon server ????

Do you want to create an admin user straight away? Yes
Username: admin
E-mail: test@mastodon.linuxbuz.com
You can login with the password: 159e473bbfe846eac169eafac880b3f0
You can change your password once you login.
Wenn du damit fertig bist, beende den Mastodon-Benutzer mit dem folgenden Befehl:
exit
Nginx als Reverse Proxy für Mastodon konfigurieren
Als Nächstes musst du Nginx und Certbot auf deinem System installieren. Standardmäßig ist die neueste Version von Certbot nicht im Standard-Repository von Ubuntu 22.04 verfügbar. Daher musst du das Certbot-Repository zu deinem System hinzufügen.
Du kannst es mit dem folgenden Befehl hinzufügen:
add-apt-repository ppa:certbot/certbot
Als Nächstes aktualisierst du das Repository und installierst Certbot mit Nginx, indem du den folgenden Befehl ausführst:
apt-get update -y
apt-get install nginx python-certbot-nginx -y
Sobald beide Pakete installiert sind, kopierst du die Nginx-Konfigurationsdatei aus dem Mastodon-Verzeichnis mit folgendem Befehl nach Nginx:
cp /home/mastodon/live/dist/nginx.conf /etc/nginx/sites-available/mastodon.conf
Als Nächstes aktivierst du die Konfigurationsdatei des virtuellen Mastodon-Hosts mit folgendem Befehl:
ln -s /etc/nginx/sites-available/mastodon.conf /etc/nginx/sites-enabled/
Standardmäßig ist die Mastodon-Konfigurationsdatei für virtuelle Hosts mit der Domain example.com konfiguriert. Daher musst du die Domain example.com in der Datei mastodon.conf durch deinen Domainnamen ersetzen . Du kannst sie mit dem folgenden Befehl ersetzen:
sed -i 's/example.com/mastodon.example.com/g' /etc/nginx/sites-enabled/mastodon.conf
Starte anschließend den Nginx-Dienst neu, um die Konfiguration zu übernehmen:
systemctl restart nginx
Als Nächstes lädst du das kostenlose SSL-Zertifikat von Let’s Encrypt herunter und konfigurierst Nginx für die Verwendung dieses Zertifikats, indem du den Befehl certbot ausführst:
certbot --nginx -d mastodon.example.com
Dadurch wird ein kostenloses Let’s Encrypt SSL-Zertifikat heruntergeladen und Nginx für deine Domain mastodon.example.com konfiguriert.
Systemd-Dienst für Mastodon erstellen
Nginx ist nun installiert und so konfiguriert, dass es Mastodon bedient. Als Nächstes musst du die systemd-Dienstdatei für Mastodon konfigurieren. Dazu kopierst du die systemd-Dienstvorlagen aus dem Mastodon-Verzeichnis:
cp /home/mastodon/live/dist/mastodon-web.service /etc/systemd/system/
cp /home/mastodon/live/dist/mastodon-sidekiq.service /etc/systemd/system/
cp /home/mastodon/live/dist/mastodon-streaming.service /etc/systemd/system/
Als Nächstes startest du alle Dienste und aktivierst sie mit dem folgenden Befehl, damit sie nach einem Neustart starten:
systemctl start mastodon-web
systemctl start mastodon-sidekiq
systemctl start mastodon-streaming
systemctl enable mastodon-web
systemctl enable mastodon-sidekiq
systemctl enable mastodon-streaming
Als Nächstes überprüfst du den Status des Mastodon-Dienstes mit dem folgenden Befehl:
systemctl status mastodon-web mastodon-sidekiq mastodon-streaming
Du erhältst die folgende Ausgabe:
? mastodon-web.service - mastodon-web
     Loaded: loaded (/etc/systemd/system/mastodon-web.service; disabled; vendor preset: enabled)
     Active: active (running) since Tue 2022-10-18 15:47:13 UTC; 56s ago
   Main PID: 78185 (bundle)
      Tasks: 29 (limit: 2242)
     Memory: 296.7M
        CPU: 10.554s
     CGroup: /system.slice/mastodon-web.service
             ??78185 "puma 5.6.4 (tcp://127.0.0.1:3000) [live]" "" "" "" "" "" "" "" "" "" "" "" "" "" "" "" "" "" "" "" "" "" "" "" "" "" "">
             ??78224 "puma: cluster worker 0: 78185 [live]" "" "" "" "" "" "" "" "" "" "" "" "" "" "" "" "" "" "" "" "" "" "" "" "" "" "" "" >
             ??78228 "puma: cluster worker 1: 78185 [live]" "" "" "" "" "" "" "" "" "" "" "" "" "" "" "" "" "" "" "" "" "" "" "" "" "" "" "" >

Oct 18 15:47:14 ubuntu2204 bundle[78185]: [78185] *  Max threads: 5
Oct 18 15:47:14 ubuntu2204 bundle[78185]: [78185] *  Environment: production
Oct 18 15:47:14 ubuntu2204 bundle[78185]: [78185] *   Master PID: 78185
Oct 18 15:47:14 ubuntu2204 bundle[78185]: [78185] *      Workers: 2
Oct 18 15:47:14 ubuntu2204 bundle[78185]: [78185] *     Restarts: (?) hot (?) phased
Oct 18 15:47:14 ubuntu2204 bundle[78185]: [78185] * Preloading application
Oct 18 15:47:27 ubuntu2204 bundle[78185]: [78185] * Listening on http://127.0.0.1:3000
Oct 18 15:47:27 ubuntu2204 bundle[78185]: [78185] Use Ctrl-C to stop
Oct 18 15:47:27 ubuntu2204 bundle[78185]: [78185] - Worker 0 (PID: 78224) booted in 0.04s, phase: 0
Oct 18 15:47:27 ubuntu2204 bundle[78185]: [78185] - Worker 1 (PID: 78228) booted in 0.02s, phase: 0

? mastodon-sidekiq.service - mastodon-sidekiq
     Loaded: loaded (/etc/systemd/system/mastodon-sidekiq.service; disabled; vendor preset: enabled)
     Active: active (running) since Tue 2022-10-18 15:47:20 UTC; 48s ago
   Main PID: 78206 (bundle)
      Tasks: 32 (limit: 2242)
     Memory: 242.5M
        CPU: 10.113s
     CGroup: /system.slice/mastodon-sidekiq.service
             ??78206 "sidekiq 6.4.2 live [0 of 25 busy]" "" "" "" "" "" "" "" "" "" "" "" "" "" "" "" "" "" "" "" "" "" "" "" "" "" "" "" "" >

Oct 18 15:47:35 ubuntu2204 bundle[78206]: 2022-10-18T15:47:35.747Z pid=78206 tid=1mle INFO: Scheduling accounts_statuses_cleanup_scheduler {">
Oct 18 15:47:35 ubuntu2204 bundle[78206]: 2022-10-18T15:47:35.748Z pid=78206 tid=1mle INFO: Schedules Loaded
Zugriff auf Mastodon Web Interface
Öffne nun deinen Webbrowser und gib die URL https://mastodon.example.com ein. Du wirst auf die folgende Seite von Mastodon online weitergeleitet:

Gib nun deine Admin-E-Mail und dein Passwort ein, die du zuvor erstellt hast, und klicke auf die Schaltfläche Anmelden. Du solltest die folgende Seite sehen:
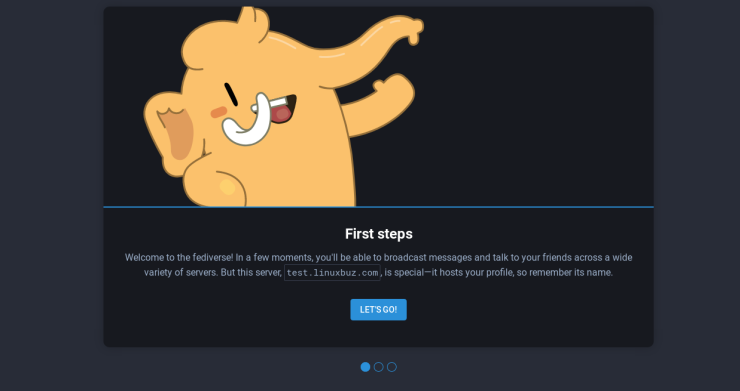
Klicke jetzt auf die Schaltfläche LET’S GO! Du solltest die folgende Seite sehen:
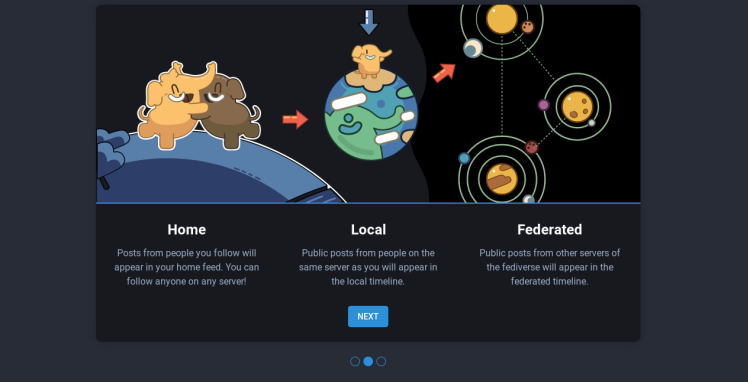
Klicke jetzt auf die Schaltfläche Weiter. Du solltest die folgende Seite sehen:
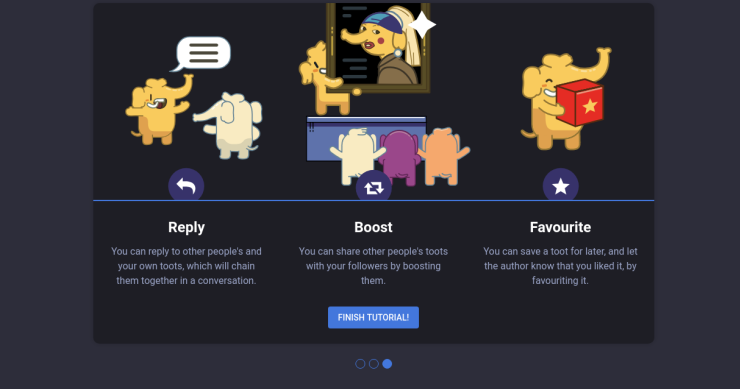
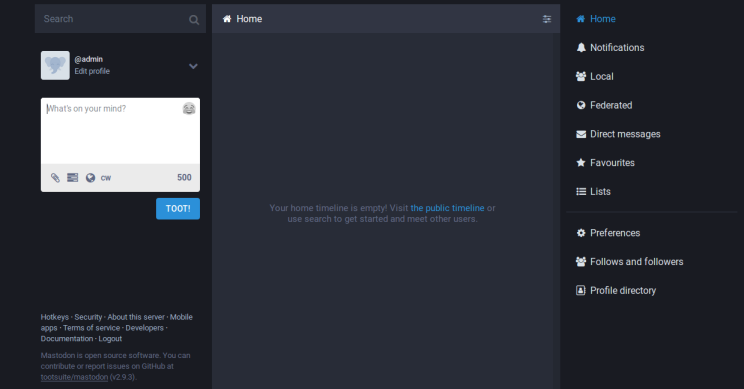
Klicke jetzt auf die Schaltfläche TUTORIAL BEENDEN! Auf der folgenden Seite solltest du das Mastodon-Dashboard sehen:
Fazit
Glückwunsch! Du hast Mastodon erfolgreich auf einem Ubuntu 22.04 Server installiert (setup mastodon server) und konfiguriert und kannst mit dieser Anleitung Mastodon server hosten. Jetzt kannst du mit Mastodon ganz einfach dein eigenes soziales Mediennetzwerk erstellen. Wenn du noch Fragen hast, kannst du dich gerne an mich wenden.