Wie installiere ich Concrete5 CMS mit Apache und kostenlosem Let’s Encrypt SSL auf Ubuntu 20.04
Concrete5 ist ein Open-Source Content Management System, mit dem du Inhalte im Internet veröffentlichen kannst. Das CMS ist in PHP geschrieben und nutzt MariaDB als Datenbank-Backend. Es bietet einen einfach zu bedienenden Builder, der dir hilft, Seiten und Inhalte über den Webbrowser zu erstellen. Es ist flexibel, sicher, mobilfähig und basiert auf einer Model-View-Controller Architektur. Er bietet eine Vielzahl von Funktionen, wie z.B. WYSIWYG Content Editor, Media Manager, Drag and Drop Content, In-Context Editing und vieles mehr.
In diesem Beitrag zeigen wir dir, wie du Concrete5 CMS mit Apache und Let’s Encrypt SSL auf einem Ubuntu 20.04 Server installieren kannst.
Voraussetzungen
- Ein Server, auf dem Ubuntu 20.04 läuft.
- Ein gültiger Domainname, der auf die Server-IP zeigt.
- Ein Root-Passwort ist auf deinem Server konfiguriert.
Erste Schritte
Zuerst musst du den APT Paketindex auf die neueste Version aktualisieren. Du kannst ihn mit dem folgenden Befehl aktualisieren:
apt-get update -y
Sobald der APT-Index aktualisiert ist, kannst du mit dem nächsten Schritt fortfahren.
Installiere Apache, MariaDB und PHP
Als nächstes musst du den Apache Webserver, den MariaDB Datenbankserver, PHP und andere PHP Erweiterungen auf deinem Server installieren. Du kannst sie alle mit dem folgenden Befehl installieren:
apt-get install apache2 mariadb-server php libapache2-mod-php libapache2-mod-php php-common php-mbstring php-xmlrpc php-soap php-gd php-xml php-intl php-mysql php-cli php-ldap php-zip php-curl -y
Sobald alle Pakete installiert sind, bearbeite die Datei php.ini und setze die gewünschten Werte:
nano /etc/php/7.4/apache2/php.ini
Ändere die folgenden Zeilen:
file_uploads = On
allow_url_fopen = On
memory_limit = 256M
upload_max_filesize = 64M
date.timezone = Asia/Kolkata
Speichere und schließe die Datei, wenn du fertig bist und starte den Apache-Dienst neu, um die Änderungen zu übernehmen:
systemctl restart apache2
Sobald du fertig bist, kannst du mit dem nächsten Schritt fortfahren.
Erstelle eine Concrete5 Datenbank
Als nächstes musst du eine Datenbank und einen Benutzer für Concrete5 erstellen. Logge dich zuerst mit folgendem Kommando in die MariaDB ein:
mysql
Sobald du eingeloggt bist, erstelle eine Datenbank und einen Benutzer mit dem folgenden Kommando:
MariaDB [(none)]> CREATE DATABASE concrete5;
MariaDB [(none)]> CREATE USER 'concrete5user'@'localhost' IDENTIFIED BY 'password';
Als nächstes gibst du der Concrete5 Datenbank alle Rechte mit folgendem Kommando:
MariaDB [(none)]> GRANT ALL ON concrete5.* TO 'concrete5user'@'localhost' IDENTIFIED BY 'password' WITH GRANT OPTION;
Als nächstes lösche die Privilegien und verlasse die MariaDB Konsole mit dem folgenden Befehl:
MariaDB [(none)]> FLUSH PRIVILEGES;
MariaDB [(none)]> EXIT;
Sobald du damit fertig bist, kannst du mit dem nächsten Schritt fortfahren.
Concrete5 CMS herunterladen
Gehe zuerst auf die Concrete5 CMS Webseite, kopiere die URL der neuesten Version von Concrete5 und lade sie mit dem folgenden Befehl herunter:
wget --trust-server-names https://www.concrete5.org/download_file/-/view/115589/ -O concrete5.zip
Sobald der Download abgeschlossen ist, extrahiere die heruntergeladene Datei mit dem folgenden Befehl:
unzip concrete5.zip
Als nächstes verschiebst du das extrahierte Verzeichnis mit dem folgenden Befehl in das Apache Web Root Verzeichnis:
mv concrete5-* /var/www/html/concrete5
Setze als nächstes die richtigen Berechtigungen und Eigentümer für das concrete5 Verzeichnis mit dem folgenden Befehl:
chown -R www-data:www-data /var/www/html/concrete5/
chmod -R 755 /var/www/html/concrete5/
Sobald du damit fertig bist, kannst du mit dem nächsten Schritt fortfahren.
Apache für Concrete5 CMS konfigurieren
Als nächstes musst du eine Apache Virtual Host Konfigurationsdatei für Concrete5 CMS erstellen. Du kannst sie mit dem folgenden Kommando erstellen:
nano /etc/apache2/sites-available/concrete5.conf
Füge die folgenden Zeilen hinzu:
<VirtualHost *:80>
     ServerAdmin admin@example.com
     DocumentRoot /var/www/html/concrete5/
     ServerName concrete5.example.com

     <Directory /var/www/html/concrete5/>
        Options +FollowSymlinks
        AllowOverride All
        Require all granted
     </Directory>

     ErrorLog ${APACHE_LOG_DIR}/error.log
     CustomLog ${APACHE_LOG_DIR}/access.log combined

</VirtualHost>
Speichere und schließe die Datei und aktiviere dann den Apache Virtual Host und das Rewrite Modul mit dem folgenden Befehl:
a2ensite concrete5.conf
a2enmod rewrite
Starte als nächstes den Apache Dienst neu, um die Änderungen zu übernehmen:
systemctl restart apache2
Du kannst auch den Status des Apache-Dienstes mit folgendem Befehl überprüfen:
systemctl status apache2
Du solltest die folgende Ausgabe erhalten:
? apache2.service - The Apache HTTP Server
     Loaded: loaded (/lib/systemd/system/apache2.service; enabled; vendor preset: enabled)
     Active: active (running) since Sat 2021-05-15 15:00:03 UTC; 4s ago
       Docs: https://httpd.apache.org/docs/2.4/
    Process: 15566 ExecStart=/usr/sbin/apachectl start (code=exited, status=0/SUCCESS)
   Main PID: 15585 (apache2)
      Tasks: 6 (limit: 2353)
     Memory: 13.5M
     CGroup: /system.slice/apache2.service
             ??15585 /usr/sbin/apache2 -k start
             ??15586 /usr/sbin/apache2 -k start
             ??15587 /usr/sbin/apache2 -k start
             ??15588 /usr/sbin/apache2 -k start
             ??15589 /usr/sbin/apache2 -k start
             ??15590 /usr/sbin/apache2 -k start

May 15 15:00:03 ubuntu2004 systemd[1]: Starting The Apache HTTP Server...
An diesem Punkt ist der Apache Webserver so konfiguriert, dass er Concrete5 CMS hostet. Du kannst nun mit dem nächsten Schritt fortfahren.
Zugriff auf das Concrete5 CMS Web Interface
Öffne nun deinen Webbrowser und rufe das Concrete5 CMS Webinterface über die URL http://concrete5.example.com auf. Du wirst auf die folgende Seite weitergeleitet:

Wähle deine Sprache aus und klicke auf den Pfeil-Button. Du solltest nun die folgende Seite sehen:
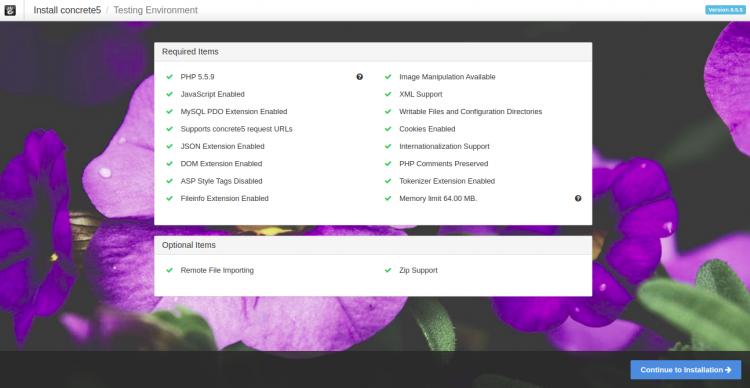
Vergewissere dich, dass alle benötigten Bibliotheken installiert sind, dann klicke auf den Button Weiter zur Installation, du solltest die folgende Seite sehen:
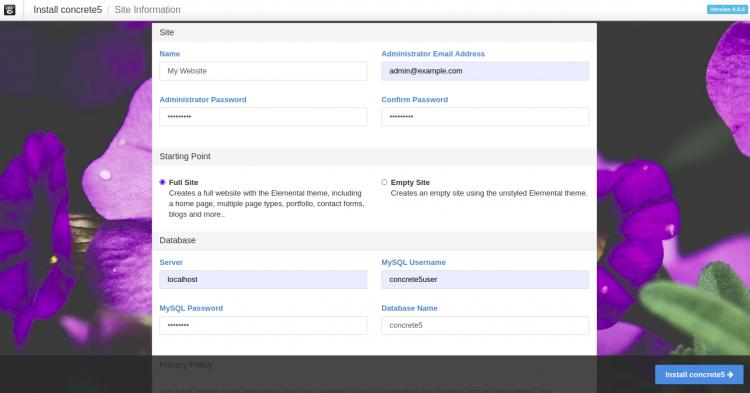
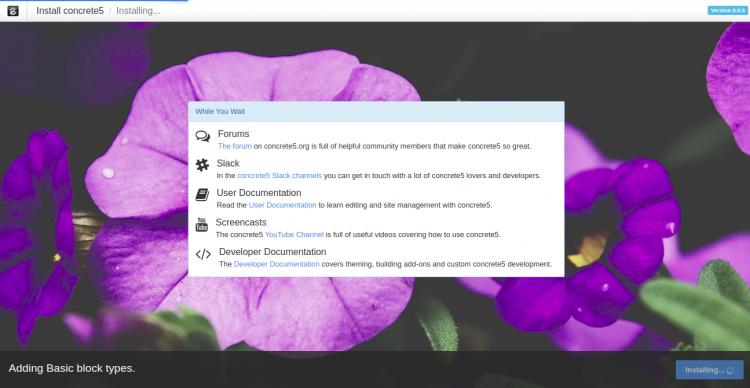
Hier gibst du den Admin-Benutzernamen, das Passwort, den Datenbank-Benutzernamen, das Passwort und den Datenbanknamen ein und klickst dann auf den Install Concrete5 Button, um die Installation zu starten. Sobald die Installation abgeschlossen ist, solltest du die folgende Seite sehen:
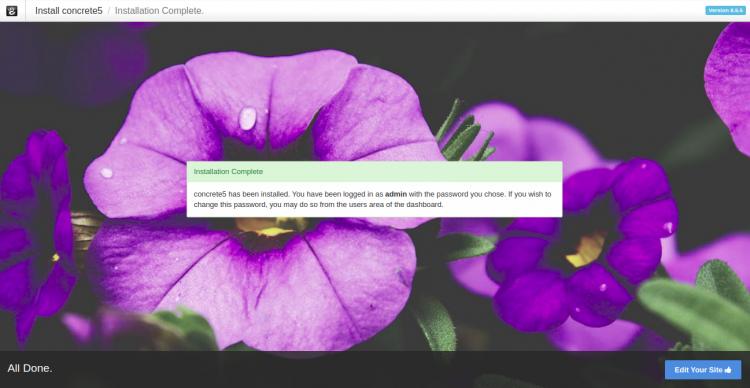
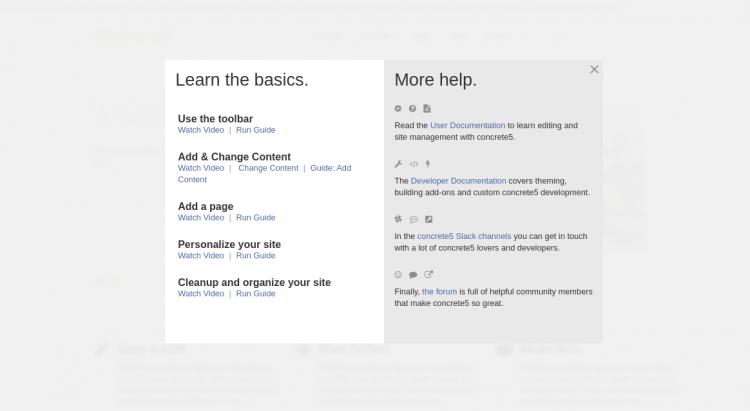
Klicke nun auf den Edit Your Site Button, du solltest das Concrete5 Dashboard auf der folgenden Seite sehen:
Concrete5 mit Let’s Encrypt SSL sichern
Als nächstes empfiehlt es sich, deine Webseite mit Let’s Encrypt SSL zu sichern. Als erstes installierst du den Certbot Client mit dem folgenden Befehl:
apt-get install python3-certbot-apache -y
Sobald er installiert ist, führe den folgenden Befehl aus, um deine Website mit Let’s Encrypt SSL zu sichern:
certbot --apache -d concrete5.example.com
Du wirst aufgefordert, deine E-Mail-Adresse anzugeben und die Nutzungsbedingungen zu akzeptieren, wie unten gezeigt:
Saving debug log to /var/log/letsencrypt/letsencrypt.log
Plugins selected: Authenticator standalone, Installer None
Enter email address (used for urgent renewal and security notices) (Enter 'c' to
cancel): hitjethva1981@gmail.com

- - - - - - - - - - - - - - - - - - - - - - - - - - - - - - - - - - - - - - - -
Please read the Terms of Service at
https://letsencrypt.org/documents/LE-SA-v1.2-November-15-2017.pdf. You must
agree in order to register with the ACME server at
https://acme-v02.api.letsencrypt.org/directory
- - - - - - - - - - - - - - - - - - - - - - - - - - - - - - - - - - - - - - - -
(A)gree/(C)ancel: A

- - - - - - - - - - - - - - - - - - - - - - - - - - - - - - - - - - - - - - - -
Would you be willing to share your email address with the Electronic Frontier
Foundation, a founding partner of the Let's Encrypt project and the non-profit
organization that develops Certbot? We'd like to send you email about our work
encrypting the web, EFF news, campaigns, and ways to support digital freedom.
- - - - - - - - - - - - - - - - - - - - - - - - - - - - - - - - - - - - - - - -
(Y)es/(N)o: Y
Plugins selected: Authenticator apache, Installer apache
Obtaining a new certificate
Performing the following challenges:
http-01 challenge for concrete5.example.com
Enabled Apache rewrite module
Waiting for verification...
Cleaning up challenges
Created an SSL vhost at /etc/apache2/sites-available/concrete5-le-ssl.conf
Enabled Apache socache_shmcb module
Enabled Apache ssl module
Deploying Certificate to VirtualHost /etc/apache2/sites-available/concrete5-le-ssl.conf
Enabling available site: /etc/apache2/sites-available/concrete5-le-ssl.conf
Als nächstes wählst du aus, ob der HTTP-Verkehr auf HTTPS umgeleitet werden soll oder nicht, wie unten gezeigt:
Please choose whether or not to redirect HTTP traffic to HTTPS, removing HTTP access.
- - - - - - - - - - - - - - - - - - - - - - - - - - - - - - - - - - - - - - - -
1: No redirect - Make no further changes to the webserver configuration.
2: Redirect - Make all requests redirect to secure HTTPS access. Choose this for
new sites, or if you're confident your site works on HTTPS. You can undo this
change by editing your web server's configuration.
- - - - - - - - - - - - - - - - - - - - - - - - - - - - - - - - - - - - - - - -
Select the appropriate number [1-2] then [enter] (press 'c' to cancel): 2
Tippe 2 ein und drücke Enter, um Let’s Encrypt SSL für deine Website zu installieren:
Enabled Apache rewrite module
Redirecting vhost in /etc/apache2/sites-enabled/concrete5.conf to ssl vhost in /etc/apache2/sites-available/concrete5-le-ssl.conf

- - - - - - - - - - - - - - - - - - - - - - - - - - - - - - - - - - - - - - - -
Congratulations! You have successfully enabled https://concrete5.example.com

You should test your configuration at:
https://www.ssllabs.com/ssltest/analyze.html?d=concrete5.example.com
- - - - - - - - - - - - - - - - - - - - - - - - - - - - - - - - - - - - - - - -

IMPORTANT NOTES:
 - Congratulations! Your certificate and chain have been saved at:
   /etc/letsencrypt/live/concrete5.example.com/fullchain.pem
   Your key file has been saved at:
   /etc/letsencrypt/live/concrete5.example.com/privkey.pem
   Your cert will expire on 2020-10-23. To obtain a new or tweaked
   version of this certificate in the future, simply run certbot again
   with the "certonly" option. To non-interactively renew *all* of
   your certificates, run "certbot renew"
 - If you like Certbot, please consider supporting our work by:

   Donating to ISRG / Let's Encrypt:   https://letsencrypt.org/donate
   Donating to EFF:                    https://eff.org/donate-le
Jetzt kannst du Concrete 5 sicher über die URL https://concrete5.example.com aufrufen.
Fazit
In der obigen Anleitung hast du gelernt, wie man das Concrete5 CMS mit Apache und Let’s Encrypt SSL auf Ubuntu 20.04 installiert. Du kannst nun deine Inhalte mit dem Concrete5 CMS einfach im Internet veröffentlichen. Wenn du noch Fragen hast, kannst du dich gerne an mich wenden.