Installation von Lighttpd mit PHP 7 (PHP-FPM) und MySQL 5.7 auf Ubuntu 16.04 LTS
Lighttpd ist ein sicherer, schneller, standardkonformer Webserver, der für geschwindigkeitskritische Umgebungen entwickelt wurde. Dieses Tutorial zeigt, wie Sie Lighttpd auf einem Ubuntu 16.04 Server mit PHP 7 Unterstützung (über PHP-FPM) und MySQL 5.7 installieren können. PHP-FPM (FastCGI Process Manager) ist eine alternative PHP FastCGI-Implementierung mit einigen zusätzlichen Funktionen, die für Websites jeder Größe, insbesondere für geschäftigere Websites, nützlich sind. Ich verwende in diesem Tutorial PHP-FPM anstelle von Lighttpds spawn-fcgi.
1 Vorbemerkung
In diesem Tutorial verwende ich den Hostnamen server1.example.com mit der IP-Adresse 192.168.1.100. Diese Einstellungen können für Sie unterschiedlich sein, so dass Sie sie gegebenenfalls ersetzen müssen.
Ich führe alle Schritte in diesem Tutorial mit root-Rechten aus, also stellen Sie sicher, dass Sie als root angemeldet sind:
sudo -s
2 Installation von MySQL 5.7
Zuerst installieren wir MySQL wie folgt:
apt-get -y install mysql-server mysql-client
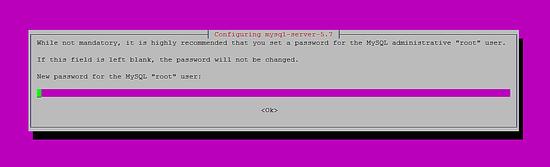
Sie werden aufgefordert, ein Passwort für den MySQL-Root-Benutzer anzugeben – dieses Passwort gilt sowohl für den Benutzer root@localhost als auch für root@server1.example.com, so dass wir später kein MySQL-Root-Passwort manuell angeben müssen:
Neues Passwort für den MySQL „root“-Benutzer: <– yourrootsqlpassword
Wiederholen Sie das Passwort für den MySQL „root“-Benutzer: <– yourrootsqlpassword
Der Installer hat ein MySQL-Root-Passwort festgelegt, aber es gibt noch einige weitere Einstellungen, die für eine sichere MySQL-Installation geändert werden sollten. Dies kann mit dem Befehl mysql_secure_installation geschehen.
mysql_secure_installation
Der Befehl ist interaktiv:
root@server1:~# mysql_secure_installation
Securing the MySQL server deployment.
Enter password for user root: <-- Enter the MySQL root password
VALIDATE PASSWORD PLUGIN can be used to test passwords
and improve security. It checks the strength of password
and allows the users to set only those passwords which are
secure enough. Would you like to setup VALIDATE PASSWORD plugin?
Press y|Y for Yes, any other key for No: <-- Press y if you want this function or press Enter otherwise.
Using existing password for root.
Change the password for root ? ((Press y|Y for Yes, any other key for No) : <-- Press enter
... skipping.
By default, a MySQL installation has an anonymous user,
allowing anyone to log into MySQL without having to have
a user account created for them. This is intended only for
testing, and to make the installation go a bit smoother.
You should remove them before moving into a production
environment.
Remove anonymous users? (Press y|Y for Yes, any other key for No) : <-- y
Success.
Normally, root should only be allowed to connect from
'localhost'. This ensures that someone cannot guess at
the root password from the network.
Disallow root login remotely? (Press y|Y for Yes, any other key for No) : <-- y
Success.
By default, MySQL comes with a database named 'test' that
anyone can access. This is also intended only for testing,
and should be removed before moving into a production
environment.
Remove test database and access to it? (Press y|Y for Yes, any other key for No) : <-- y
- Dropping test database...
Success.
- Removing privileges on test database...
Success.
Reloading the privilege tables will ensure that all changes
made so far will take effect immediately.
Reload privilege tables now? (Press y|Y for Yes, any other key for No) : <-- y
Success.
All done!
3 Installation von Lighttpd
Lighttpd ist als Ubuntu-Paket erhältlich. Daher können wir es direkt mit apt aus dem Ubuntu Xenial Xerus Package Repository installieren:
apt-get -y install lighttpd
Richten Sie nun Ihren Browser auf http://192.168.1.100/, und Sie sollten die Lighttpd-Platzhalterseite sehen:
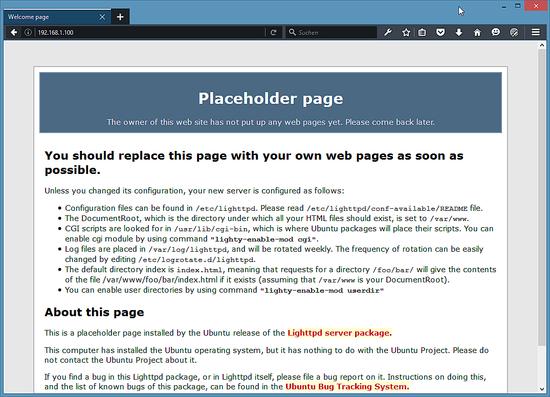
Lighttpds Standard-Dokumentenstamm ist /var/wwww/html auf Ubuntu, und die Konfigurationsdatei ist /etc/lighttpd/lighttpd/lighttpd.conf. Weitere Konfigurationen werden in Dateien im Verzeichnis /etc/lighttpd/conf-available gespeichert – diese Konfigurationen können mit dem Befehl lighttpd-enable-mod aktiviert werden, der einen Symlink aus dem Verzeichnis /etc/lighttpd/conf-enabled zur entsprechenden Konfigurationsdatei in /etc/lighttpd/conf-available erstellt. Sie können Konfigurationen mit dem Befehl lighttpd-disable-mod deaktivieren.
4 Installation von PHP 7.0
Wir können PHP in Lighttpd durch PHP-FPM funktionieren lassen, das wir so installieren:
apt-get -y install php7.0-fpm php7.0
PHP-FPM ist ein Daemon-Prozess (mit dem Initskript php5-fpm), der einen FastCGI-Server auf dem Socket /var/run/php/php/php7.0-fpm.sock betreibt.
5 Lighttpd und PHP 7.0 konfigurieren
Um PHP in Lighttpd zu aktivieren, müssen wir /etc/php/7.0/fpm/php.ini ändern und die Zeile cgi.fix_pathinfo=1 auskommentieren:
nano /etc/php/7.0/fpm/php.ini
[...]
; cgi.fix_pathinfo provides *real* PATH_INFO/PATH_TRANSLATED support for CGI.  PHP's
; previous behaviour was to set PATH_TRANSLATED to SCRIPT_FILENAME, and to not grok
; what PATH_INFO is.  For more information on PATH_INFO, see the cgi specs.  Setting
; this to 1 will cause PHP CGI to fix its paths to conform to the spec.  A setting
; of zero causes PHP to behave as before.  Default is 1.  You should fix your scripts
; to use SCRIPT_FILENAME rather than PATH_TRANSLATED.
; http://php.net/cgi.fix-pathinfo
cgi.fix_pathinfo=1
[...]
Die Lighttpd-Konfigurationsdatei für PHP /etc/lighttpd/conf-available/15-fastcgi-php.conf ist für die Verwendung mit spawn-fcgi geeignet, wir wollen jedoch PHP-FPM verwenden, daher erstellen wir ein Backup der Datei (genannt 15-fastcgi-php.conf.bak) und ändern 15-fastcgi-php.conf wie folgt:
cd /etc/lighttpd/conf-available/
cp 15-fastcgi-php.conf 15-fastcgi-php.conf.bak
nano 15-fastcgi-php.conf
# /usr/share/doc/lighttpd-doc/fastcgi.txt.gz
# http://redmine.lighttpd.net/projects/lighttpd/wiki/Docs:ConfigurationOptions#mod_fastcgi-fastcgi

## Start an FastCGI server for php (needs the php7.0-cgi package)
fastcgi.server += ( ".php" =>
        ((
                "socket" => "/var/run/php/php7.0-fpm.sock",
                "broken-scriptfilename" => "enable"
        ))
)
Um die Fastcgi-Konfiguration zu aktivieren, führen Sie die folgenden Befehle aus:
lighttpd-enable-mod fastcgi
lighttpd-enable-mod fastcgi-php
Dadurch werden die symbolischen Links /etc/lighttpd/conf-enabled/10-fastcgi.conf erstellt, die auf /etc/lighttpd/conf-available/10-fastcgi.conf und /etc/lighttpd/conf-enabled/15-fastcgi-php.conf verweisen, die auf /etc/lighttpd/conf-available/15-fastcgi-php.conf zeigen:
ls -l /etc/lighttpd/conf-enabled
root@server1:/etc/lighttpd/conf-available# ls -l /etc/lighttpd/conf-enabled
total 0
lrwxrwxrwx 1 root root 33 Apr 27 11:26 10-fastcgi.conf -> ../conf-available/10-fastcgi.conf
lrwxrwxrwx 1 root root 37 Apr 27 11:26 15-fastcgi-php.conf -> ../conf-available/15-fastcgi-php.conf
lrwxrwxrwx 1 root root 42 Apr 21 11:10 90-javascript-alias.conf -> ../conf-available/90-javascript-alias.conf
root@server1:/etc/lighttpd/conf-available#
Dann laden wir Lighttpd nach:
service lighttpd force-reload
Hinweis: Wenn Sie Gebietsschemafehler erhalten, können Sie den Fehler beheben, indem Sie die Option
apt-get -y install language-pack-en-base
dpkg-reconfigure locales
6 Testen von PHP 7.0 / Details über Ihre PHP-Installation erhalten
Das Dokumentenverzeichnis der Standardwebsite ist /var/wwww/html. Wir werden nun eine kleine PHP-Datei (info.php) in diesem Verzeichnis erstellen und sie in einem Browser aufrufen. Die Datei zeigt viele nützliche Details über unsere PHP-Installation, wie z.B. die installierte PHP-Version.
nano /var/www/html/info.php
<?php
phpinfo();
?>
Nun rufen wir diese Datei in einem Browser (z.B. http://192.168.1.100/info.php) auf:
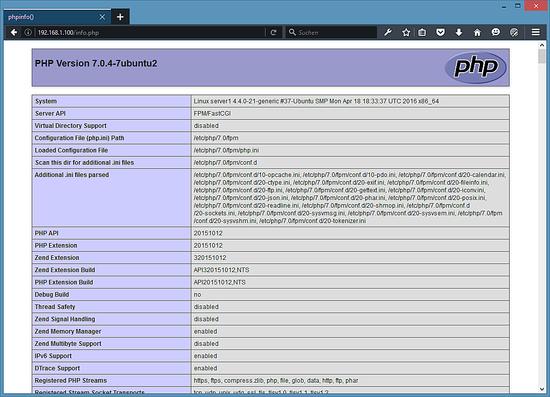
Wie Sie sehen, funktioniert PHP 7.0, und es arbeitet mit FPM/FastCGI, wie in der Server-API-Zeile dargestellt. Wenn Sie weiter nach unten scrollen, sehen Sie alle Module, die in PHP5 bereits aktiviert sind. MySQL ist dort nicht aufgeführt, was bedeutet, dass wir noch keine MySQL-Unterstützung in PHP haben.
7 MySQL-Unterstützung in PHP erhalten
Um MySQL-Unterstützung in PHP zu erhalten, können wir das Paket php7.0-mysql installieren. Es ist eine gute Idee, einige andere PHP-Module zu installieren, da Sie diese für Ihre Anwendungen benötigen könnten. Sie können auf diese Weise nach verfügbaren PHP-Modulen suchen:
apt-cache search php7.0
Wählen Sie die gewünschten aus und installieren Sie sie so:
apt-get -y install php7.0-mysql php7.0-curl php7.0-gd php7.0-intl php-pear php-imagick php7.0-imap php7.0-mcrypt php-memcache php7.0-pspell php7.0-recode php7.0-sqlite3 php7.0-tidy php7.0-xmlrpc php7.0-xsl php7.0-mbstring php-gettext
APCu ist eine Erweiterung für das PHP Opcache Modul, das mit PHP 7 ausgeliefert wird, es erweitert einige Kompatibilitätsfunktionen für Software, die den APC-Cache unterstützt (z.B. WordPress Cache Plugins).
APCu kann wie folgt installiert werden:
apt-get -y install php-apcu
Laden Sie nun PHP-FPM neu:
service php7.0-fpm reload
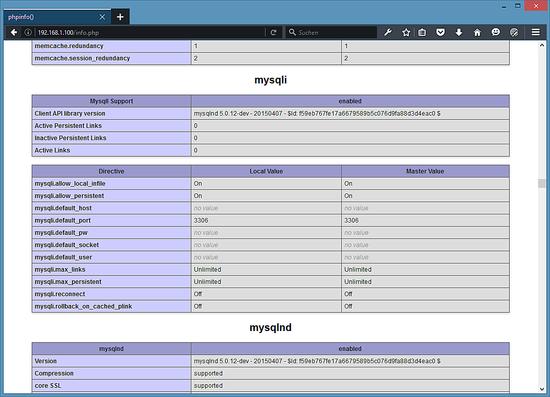
Laden Sie nun http://192.168.1.100/info.php in Ihrem Browser neu und scrollen Sie erneut nach unten zum Modulbereich. Sie sollten dort nun viele neue Module finden, darunter das mysqli- und mysqlnd-Modul:
8 phpMyAdmin
phpMyAdmin ist eine Weboberfläche, mit der Sie Ihre MySQL-Datenbanken verwalten können. Es ist eine gute Idee, es zu installieren:
apt-get -y install phpmyadmin
Sie werden die folgenden Fragen sehen:
Web server to reconfigure automatically: <-- lighttpd
Configure database for phpmyadmin with dbconfig-common? <-- Yes
MySQL application password for phpmyadmin: <-- Press Enter
Wenn Sie den folgenden Fehler erhalten:
Run /etc/init.d/lighttpd force-reload to enable changes
dpkg: error processing package phpmyadmin (--configure):
subprocess installed post-installation script returned error exit status 2
E: Sub-process /usr/bin/dpkg returned an error code (1)
Führen Sie dann diese Befehle aus:
/etc/init.d/lighttpd force-reload
apt-get -y install phpmyadmin
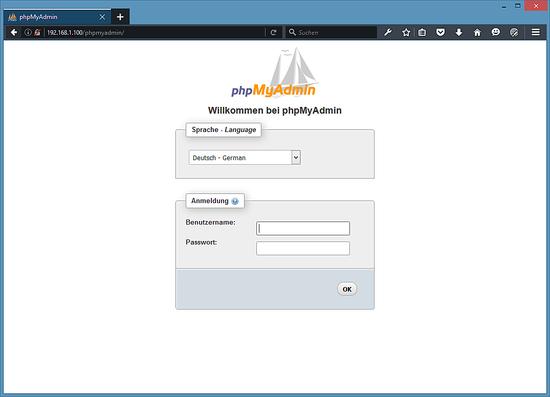
Danach können Sie phpMyAdmin unter http://192.168.1.100/phpmyadmin/: erreichen:
9 PHP-FPM dazu bringen, eine TCP-Verbindung zu verwenden (optional)
Standardmäßig lauscht PHP-FPM auf dem Socket /var/run/php/php/php7.0-fpm.sock. Es ist auch möglich, dass PHP-FPM eine TCP-Verbindung verwendet. Öffnen Sie dazu /etc/php/7.0/fpm/pool.d/www.conf…
nano /etc/php/7.0/fpm/pool.d/www.conf
…. und lassen Sie die Hörleitung wie folgt aussehen:
[...]
;listen = /var/run/php/php7.0-fpm.sock
listen = 127.0.0.1:9000
[...]
Dadurch wird PHP-FPM auf Port 9000 auf der IP 127.0.0.0.0.1 (localhost) lauschen. Stellen Sie sicher, dass Sie einen Port verwenden, der auf Ihrem System nicht verwendet wird.
Laden Sie dann PHP-FPM neu:
service php7.0-fpm reload
Öffnen Sie als nächstes die PHP-Konfigurationsdatei von Lighttpd /etc/lighttpd/conf-available/15-fastcgi-php.conf und ersetzen Sie die Socket-Leitung durch Host- und Portleitungen:
nano /etc/lighttpd/conf-available/15-fastcgi-php.conf
# /usr/share/doc/lighttpd-doc/fastcgi.txt.gz
# http://redmine.lighttpd.net/projects/lighttpd/wiki/Docs:ConfigurationOptions#mod_fastcgi-fastcgi

## Start an FastCGI server for php (needs the php7.0-cgi package)
fastcgi.server += ( ".php" =>
        ((
                "host" => "127.0.0.1",
                "port" => "9000",
                "broken-scriptfilename" => "enable"
        ))
)
Laden Sie schließlich Lighttpd neu:
service lighttpd force-reload
10 Links
- Lighttpd: http://www.lighttpd.net/
- PHP: http://www.php.net/
- PHP-FPM: http://php-fpm.org/
- MySQL: http://www.mysql.com/
- Ubuntu: http://www.ubuntu.com/
- phpMyAdmin: http://www.phpmyadmin.net/