So installierst du die ElkArte Forum Software auf Ubuntu 22.04
ElkArte ist eine kostenlose und quelloffene Forensoftware, die in der Sprache PHP geschrieben wurde. Sie basiert auf dem Simple Machines Forum, mit dem du ganz einfach ein Community-Forum erstellen kannst. Es hat sich zu einem modernen und funktionsreichen Forenpaket entwickelt, das den Ansprüchen der heutigen Forenbenutzer gerecht wird. Es bietet eine große Auswahl an Themes und Addons, die von der Community erstellt wurden und dir helfen, die Funktionalität von ElkArte zu erweitern.
Diese Anleitung zeigt dir, wie du ElkArte auf Ubuntu 22.04 mit Let’s Encrypt SSL installierst.
Voraussetzungen
- Ein Server, auf dem Ubuntu 22.04 läuft.
- Ein gültiger Domainname ist auf deinem Server angegeben.
- Ein Root-Passwort ist auf deinem Server eingerichtet.
Installiere Apache, PHP und MariaDB
ElkArte läuft auf einem Webserver, der auf PHP basiert und MariaDB als Datenbank-Backend verwendet. Daher musst du Apache, MariaDB, PHP und andere PHP-Erweiterungen auf deinem Server installieren.
Installiere zunächst den Apache- und MariaDB-Server mit dem folgenden Befehl:
apt install apache2 mariadb-server
Als Nächstes musst du die PHP-Version 7.4 und andere erforderliche Erweiterungen auf deinem Server installieren. Ubuntu 22.04 wird standardmäßig mit der PHP-Version 8.1 ausgeliefert. Du musst also das PHP-Repository von Ondrej auf deinem Server installieren.
apt install software-properties-common -y
add-apt-repository ppa:ondrej/php -y
Sobald das PHP-Repository zu deinem Server hinzugefügt wurde, kannst du PHP mit dem folgenden Befehl installieren:
apt install php7.4 libapache2-mod-php7.4 php7.4-common php7.4-curl php7.4-intl php7.4-mbstring php7.4-xmlrpc php7.4-mysql php7.4-gd php7.4-pgsql php7.4-xml php7.4-cli php7.4-imagick php7.4-bcmath php7.4-gmp php7.4-zip unzip -y
Sobald alle Pakete installiert sind, öffne die Datei php.ini und ändere die Standardeinstellungen:
nano /etc/php/7.4/apache2/php.ini
Ändere die folgenden Zeilen:
Change the following lines:
memory_limit = 256M
upload_max_filesize = 100M
max_execution_time = 360
date.timezone = Asia/Kolkata
Speichere und schließe die Datei und starte dann den Apache-Dienst neu, um die Änderungen zu übernehmen:
systemctl restart apache2
MariaDB-Datenbank konfigurieren
Sichere zunächst die MariaDB-Installation und setze das MariaDB-Root-Passwort mit dem folgenden Befehl:
mysql_secure_installation
Beantworte alle Fragen wie unten gezeigt:
Enter current password for root (enter for none):
Set root password? [Y/n] Y
New password:
Re-enter new password:
Remove anonymous users? [Y/n] Y
Disallow root login remotely? [Y/n] Y
Remove test database and access to it? [Y/n] Y
Reload privilege tables now? [Y/n] Y
Melde dich dann mit folgendem Befehl in der MariaDB-Shell an:
mysql -u root -p
Nach der Anmeldung erstellst du eine Datenbank und einen Benutzer für ElkArte:
MariaDB [(none)]> CREATE DATABASE elkdb;
MariaDB [(none)]> CREATE USER 'elk'@'localhost' IDENTIFIED BY 'password';
Erteile der elkdb mit folgendem Befehl alle Berechtigungen:
MariaDB [(none)]> GRANT ALL ON elkdb.* TO 'elk'@'localhost' WITH GRANT OPTION;
Lösche die Berechtigungen und verlasse die MariaDB-Shell mit folgendem Befehl:
MariaDB [(none)]> FLUSH PRIVILEGES;
MariaDB [(none)]> EXIT;
Sobald die Datenbank konfiguriert ist, kannst du mit dem nächsten Schritt fortfahren.
ElkArte herunterladen
Lade zunächst die neueste Version von ElkArte mit folgendem Befehl aus dem Git-Repository herunter:
wget https://github.com/elkarte/Elkarte/releases/download/v1.1.8/ElkArte_v1-1-8_install.zip
Sobald der Download abgeschlossen ist, entpackst du die heruntergeladene Datei mit dem folgenden Befehl in das Apache-Web-Root-Verzeichnis:
unzip ElkArte_v1-1-8_install.zip -d /var/www/html/elkarte
Als Nächstes gibst du dem elkarte-Verzeichnis mit folgendem Befehl die richtigen Berechtigungen:
chown -R www-data:www-data /var/www/html/elkarte/
chmod -R 755 /var/www/html/elkarte/
Sobald du damit fertig bist, kannst du mit dem nächsten Schritt fortfahren.
Apache für ElkArte konfigurieren
Als Nächstes erstellst du eine neue Konfigurationsdatei für den virtuellen Apache-Host für ElkArte.
nano /etc/apache2/sites-available/elkarte.conf
Füge die folgenden Zeilen hinzu:
<VirtualHost *:80>
     ServerAdmin admin@example.com
     ServerName elk.linuxbuz.com
     DocumentRoot /var/www/html/elkarte

     <Directory /var/www/html/elkarte/>
          Options FollowSymlinks
          AllowOverride All
          Require all granted
     </Directory>

     ErrorLog ${APACHE_LOG_DIR}/error.log
     CustomLog ${APACHE_LOG_DIR}/access.log combined

</VirtualHost>
Speichere und schließe die Datei, wenn du fertig bist. Aktiviere dann den virtuellen Apache-Host und das Rewrite-Modul mit dem folgenden Befehl:
a2ensite elkarte.conf
a2enmod rewrite
Starte schließlich den Apache-Dienst neu, um die Änderungen zu übernehmen.
systemctl restart apache2
Du kannst den Apache-Status auch mit dem folgenden Befehl überprüfen:
systemctl status apache2
Du erhältst die folgende Ausgabe:
? apache2.service - The Apache HTTP Server
     Loaded: loaded (/lib/systemd/system/apache2.service; enabled; vendor preset: enabled)
     Active: active (running) since Sun 2022-09-11 13:35:46 UTC; 9s ago
       Docs: https://httpd.apache.org/docs/2.4/
    Process: 30485 ExecStart=/usr/sbin/apachectl start (code=exited, status=0/SUCCESS)
   Main PID: 30490 (apache2)
      Tasks: 6 (limit: 4579)
     Memory: 14.9M
        CPU: 90ms
     CGroup: /system.slice/apache2.service
             ??30490 /usr/sbin/apache2 -k start
             ??30549 /usr/sbin/apache2 -k start
             ??30550 /usr/sbin/apache2 -k start
             ??30551 /usr/sbin/apache2 -k start
             ??30552 /usr/sbin/apache2 -k start
             ??30553 /usr/sbin/apache2 -k start

Sep 11 13:35:46 ubuntu2204 systemd[1]: Starting The Apache HTTP Server...
Zugriff auf ElkArte Web Interface
Öffne nun deinen Webbrowser und gib die URL https://elk.linuxbuz.com ein. Du wirst auf die ElkArte-Willkommensseite weitergeleitet:

Klicke auf die Schaltfläche Weiter. Du solltest die Seite mit den Datenbankserver-Einstellungen sehen:

Gib deine Datenbankdaten ein und klicke auf die Schaltfläche Weiter. Du solltest die Seite mit den Forumseinstellungen sehen:
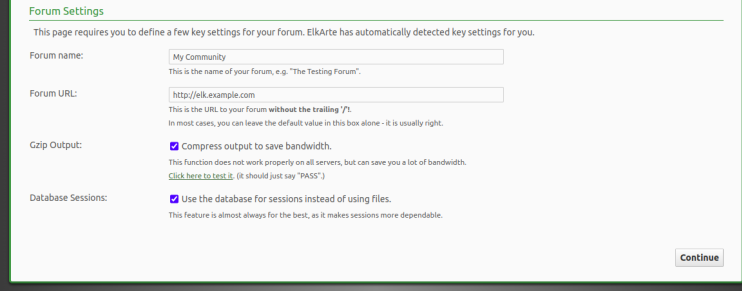
Gib deine Forums-URL und den Forumsnamen ein und klicke auf die Schaltfläche Weiter. Du solltest die folgende Seite sehen:
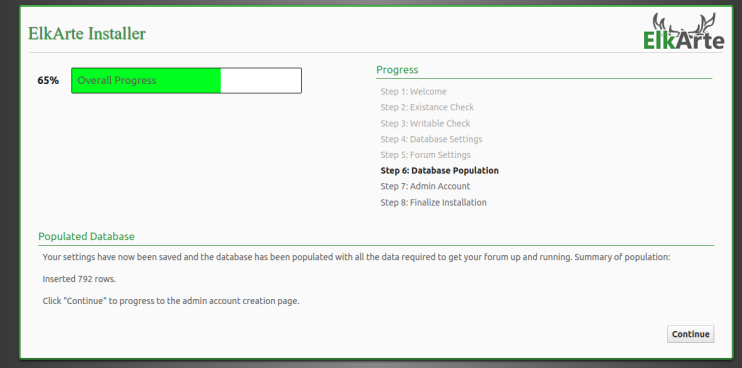
Klicke auf die Schaltfläche “ Weiter“. Du solltest die Seite zur Erstellung eines Admin-Kontos sehen:
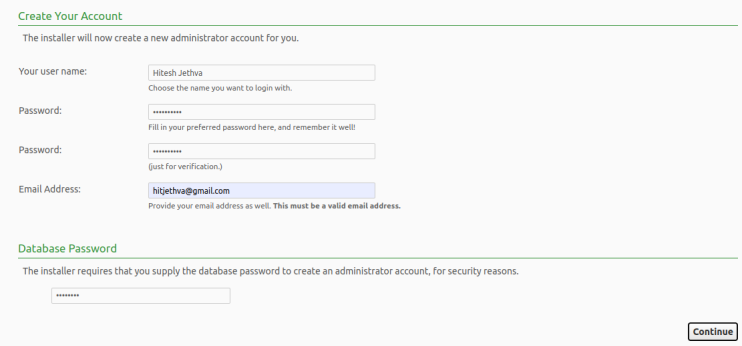
Gib deinen Admin-Benutzernamen, dein Passwort und deine E-Mail-Adresse ein und klicke auf die Schaltfläche Fortfahren. Sobald die Installation abgeschlossen ist, solltest du die folgende Seite sehen:
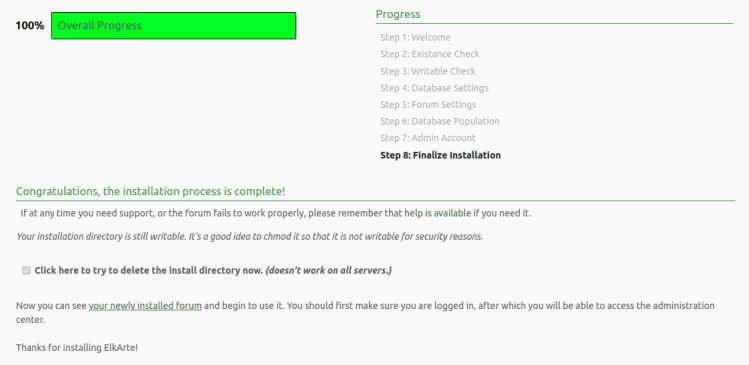
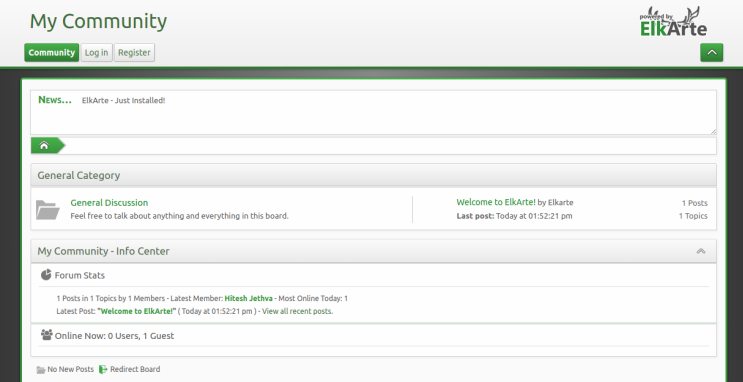
Klicke auf dein neu installiertes Forum. Auf der folgenden Seite solltest du das ElkArte-Dashboard sehen:
ElkArte mit Let’s Encrypt SSL sichern
Installiere zunächst den Certbot Let’s Encrypt Client, um das SSL für deine Website zu verwalten:
apt-get install certbot python3-certbot-apache -y
Sobald Certbot installiert ist, führe den folgenden Befehl aus, um Let’s Encrypt SSL für deine Website herunterzuladen und zu installieren:
certbot --apache -d elk.linuxbuz.com
Du wirst aufgefordert, deine E-Mail-Adresse anzugeben und die Nutzungsbedingungen zu akzeptieren (siehe unten):
Saving debug log to /var/log/letsencrypt/letsencrypt.log
Plugins selected: Authenticator apache, Installer apache
Enter email address (used for urgent renewal and security notices) (Enter 'c' to
cancel): hitjethva@gmail.com

- - - - - - - - - - - - - - - - - - - - - - - - - - - - - - - - - - - - - - - -
Please read the Terms of Service at
https://letsencrypt.org/documents/LE-SA-v1.2-November-15-2017.pdf. You must
agree in order to register with the ACME server at
https://acme-v02.api.letsencrypt.org/directory
- - - - - - - - - - - - - - - - - - - - - - - - - - - - - - - - - - - - - - - -
(A)gree/(C)ancel: A

- - - - - - - - - - - - - - - - - - - - - - - - - - - - - - - - - - - - - - - -
Would you be willing to share your email address with the Electronic Frontier
Foundation, a founding partner of the Let's Encrypt project and the non-profit
organization that develops Certbot? We'd like to send you email about our work
encrypting the web, EFF news, campaigns, and ways to support digital freedom.
- - - - - - - - - - - - - - - - - - - - - - - - - - - - - - - - - - - - - - - -
(Y)es/(N)o: Y

Obtaining a new certificate
Performing the following challenges:
http-01 challenge for elk.linuxbuz.com
Enabled Apache rewrite module
Waiting for verification...
Cleaning up challenges
Created an SSL vhost at /etc/apache2/sites-available/elk-le-ssl.conf
Enabled Apache socache_shmcb module
Enabled Apache ssl module
Deploying Certificate to VirtualHost /etc/apache2/sites-available/elk-le-ssl.conf
Enabling available site: /etc/apache2/sites-available/elk-le-ssl.conf
Als Nächstes wählst du aus, ob der HTTP-Verkehr auf HTTPS umgeleitet werden soll oder nicht (siehe unten):
Please choose whether or not to redirect HTTP traffic to HTTPS, removing HTTP access.
- - - - - - - - - - - - - - - - - - - - - - - - - - - - - - - - - - - - - - - -
1: No redirect - Make no further changes to the webserver configuration.
2: Redirect - Make all requests redirect to secure HTTPS access. Choose this for
new sites, or if you're confident your site works on HTTPS. You can undo this
change by editing your web server's configuration.
- - - - - - - - - - - - - - - - - - - - - - - - - - - - - - - - - - - - - - - -
Select the appropriate number [1-2] then [enter] (press 'c' to cancel): 2
Gib 2 ein und drücke die Eingabetaste, um die Installation abzuschließen (siehe unten).
Redirecting vhost in /etc/apache2/sites-enabled/elk.conf to ssl vhost in /etc/apache2/sites-available/elk-le-ssl.conf

- - - - - - - - - - - - - - - - - - - - - - - - - - - - - - - - - - - - - - - -
Congratulations! You have successfully enabled https://elk.linuxbuz.com

You should test your configuration at:
https://www.ssllabs.com/ssltest/analyze.html?d=elk.linuxbuz.com
- - - - - - - - - - - - - - - - - - - - - - - - - - - - - - - - - - - - - - - -

IMPORTANT NOTES:
 - Congratulations! Your certificate and chain have been saved at:
   /etc/letsencrypt/live/elk.linuxbuz.com/fullchain.pem
   Your key file has been saved at:
   /etc/letsencrypt/live/elk.linuxbuz.com/privkey.pem
   Your cert will expire on 2020-08-19. To obtain a new or tweaked
   version of this certificate in the future, simply run certbot again
   with the "certonly" option. To non-interactively renew *all* of
   your certificates, run "certbot renew"
 - Your account credentials have been saved in your Certbot
   configuration directory at /etc/letsencrypt. You should make a
   secure backup of this folder now. This configuration directory will
   also contain certificates and private keys obtained by Certbot so
   making regular backups of this folder is ideal.
 - If you like Certbot, please consider supporting our work by:

   Donating to ISRG / Let's Encrypt:   https://letsencrypt.org/donate
   Donating to EFF:                    https://eff.org/donate-le

 - We were unable to subscribe you the EFF mailing list because your
   e-mail address appears to be invalid. You can try again later by
   visiting https://act.eff.org.
Jetzt ist deine ElkArte mit Let’s Encrypt SSL gesichert.
Fazit
Herzlichen Glückwunsch! Du hast ElkArte erfolgreich mit Let’s Encrypt SSL auf Ubuntu 22.04 installiert. Du kannst jetzt ganz einfach dein eigenes Community-Forum mit ElkArte hosten. Wenn du noch Fragen hast, kannst du dich gerne an mich wenden.