Der Perfekte Server – Fedora 15 x86_64 [ISPConfig 3]
20 Installation von Jailkit
Jailkit wird nur gebraucht, wenn Sie SSH Benutzer chrooten möchten. Es kann wie folgt installiert werden (wichtig: Jailkit muss vor ISPConfig installiert werden – dies kann später nicht mehr nachgeholt werden!):
cd /tmp
wget http://olivier.sessink.nl/jailkit/jailkit-2.14.tar.gz
tar xvfz jailkit-2.14.tar.gz
cd jailkit-2.14
./configure
make
make install
cd ..
rm -rf jailkit-2.14*
21 Installation von fail2ban
Diese ist optional aber empfohlen, da der ISPConfig Monitor versucht den Log anzuzeigen:
yum install fail2ban
chkconfig –levels 235 fail2ban on
/etc/init.d/fail2ban start
22 Installation von rkhunter
rkhunter kann folgendermaßen installiert werden:
yum install rkhunter
23 Installation von SquirrelMail
Um den SquirrelMail Webclient zu installieren, benutzen Sie…
yum install squirrelmail
… und starten Apache neu:
/etc/init.d/httpd restart
Konfigurieren Sie SquirrelMail danach:
/usr/share/squirrelmail/config/conf.pl
SquirrelMail muss wissen, dass Sie Courier-IMAP/-POP3 verwenden:
SquirrelMail Configuration : Read: config.php (1.4.0)
———————————————————
Main Menu —
1. Organization Preferences
2. Server Settings
3. Folder Defaults
4. General Options
5. Themes
6. Address Books
7. Message of the Day (MOTD)
8. Plugins
9. Database
10. Languages
D. Set pre-defined settings for specific IMAP servers
C Turn color off
S Save data
Q Quit
Command >> <– D
SquirrelMail Configuration : Read: config.php
———————————————————
While we have been building SquirrelMail, we have discovered some
preferences that work better with some servers that don’t work so
well with others. If you select your IMAP server, this option will
set some pre-defined settings for that server.
Please note that you will still need to go through and make sure
everything is correct. This does not change everything. There are
only a few settings that this will change.
Please select your IMAP server:
bincimap = Binc IMAP server
courier = Courier IMAP server
cyrus = Cyrus IMAP server
dovecot = Dovecot Secure IMAP server
exchange = Microsoft Exchange IMAP server
hmailserver = hMailServer
macosx = Mac OS X Mailserver
mercury32 = Mercury/32
uw = University of Washington’s IMAP server
gmail = IMAP access to Google mail (Gmail) accounts
quit = Do not change anything
Command >> <– courier
SquirrelMail Configuration : Read: config.php
———————————————————
While we have been building SquirrelMail, we have discovered some
preferences that work better with some servers that don’t work so
well with others. If you select your IMAP server, this option will
set some pre-defined settings for that server.
Please note that you will still need to go through and make sure
everything is correct. This does not change everything. There are
only a few settings that this will change.
Please select your IMAP server:
bincimap = Binc IMAP server
courier = Courier IMAP server
cyrus = Cyrus IMAP server
dovecot = Dovecot Secure IMAP server
exchange = Microsoft Exchange IMAP server
hmailserver = hMailServer
macosx = Mac OS X Mailserver
mercury32 = Mercury/32
uw = University of Washington’s IMAP server
gmail = IMAP access to Google mail (Gmail) accounts
quit = Do not change anything
Command >> courier
imap_server_type = courier
default_folder_prefix = INBOX.
trash_folder = Trash
sent_folder = Sent
draft_folder = Drafts
show_prefix_option = false
default_sub_of_inbox = false
show_contain_subfolders_option = false
optional_delimiter = .
delete_folder = true
Press any key to continue… <– press ENTER
SquirrelMail Configuration : Read: config.php (1.4.0)
———————————————————
Main Menu —
1. Organization Preferences
2. Server Settings
3. Folder Defaults
4. General Options
5. Themes
6. Address Books
7. Message of the Day (MOTD)
8. Plugins
9. Database
10. Languages
D. Set pre-defined settings for specific IMAP servers
C Turn color off
S Save data
Q Quit
Command >> <–S
SquirrelMail Configuration : Read: config.php (1.4.0)
———————————————————
Main Menu —
1. Organization Preferences
2. Server Settings
3. Folder Defaults
4. General Options
5. Themes
6. Address Books
7. Message of the Day (MOTD)
8. Plugins
9. Database
10. Languages
D. Set pre-defined settings for specific IMAP servers
C Turn color off
S Save data
Q Quit
Command >> <–Q
Als letztes müssen Sie die Datei /etc/squirrelmail/config_local.php modifizieren und die $default_folder_prefix Variable auskommentieren – tun Sie das nicht, werden Sie folgende Fehlermeldung sehen, nachdem Sie sich in SquirrelMail eingeloggt haben:
Query: CREATE „Sent“ Reason Given: Invalid mailbox name.
vi /etc/squirrelmail/config_local.php
<?php /** * Local config overrides. * * You can override the config.php settings here. * Don't do it unless you know what you're doing. * Use standard PHP syntax, see config.php for examples. * * @copyright © 2002-2006 The SquirrelMail Project Team * @license http://opensource.org/licenses/gpl-license.php GNU Public License * @version $Id$ * @package squirrelmail * @subpackage config */ //$default_folder_prefix = ''; ?>
Nun können Sie mit Ihrem Browser auf http://server1.example.com/webmail oder http://192.168.0.100/webmail gehen, um auf SquirrelMail zuzugreifen:

24 Installation von ISPConfig 3
Um die aktuelle Version von ISPConfig 3 herunterzuladen, benutzen Sie folgende Befehle:
cd /tmp
wget http://www.ispconfig.org/downloads/ISPConfig-3-stable.tar.gz
tar xfz ISPConfig-3-stable.tar.gz
cd ispconfig3_install/install/
Führen Sie dann folgendes aus:
php -q install.php
Dies wird den ISPConfig 3 Installer starten:
[root@server1 install]# php -q install.php
——————————————————————————–
_____ ___________ _____ __ _ ____
|_ _/ ___| ___ / __ / _(_) /__
| | `–.| |_/ / | / / ___ _ __ | |_ _ __ _ _/ /
| | `–. __/ | | / _ | ‚_ | _| |/ _` | |_ |
_| |_/__/ / | | __/ (_) | | | | | | | (_| | ___
___/____/_| ____/___/|_| |_|_| |_|__, | ____/
__/ |
|___/
——————————————————————————–
>> Initial configuration
Operating System: Redhat or compatible, unknown version.
Following will be a few questions for primary configuration so be careful.
Default values are in [brackets] and can be accepted with <ENTER>.
Tap in „quit“ (without the quotes) to stop the installer.
Select language (en,de) [en]: <– ENTER
Installation mode (standard,expert) [standard]: <– ENTER
Full qualified hostname (FQDN) of the server, eg server1.domain.tld [server1.example.com]: <– ENTER
MySQL server hostname [localhost]: <– ENTER
MySQL root username [root]: <– ENTER
MySQL root password []: <– IhrrootsqlPasswort
MySQL database to create [dbispconfig]: <– ENTER
MySQL charset [utf8]: <– ENTER
Generating a 2048 bit RSA private key
……+++
……………+++
writing new private key to ’smtpd.key‘
—–
You are about to be asked to enter information that will be incorporated
into your certificate request.
What you are about to enter is what is called a Distinguished Name or a DN.
There are quite a few fields but you can leave some blank
For some fields there will be a default value,
If you enter ‚.‘, the field will be left blank.
—–
Country Name (2 letter code) [XX]: <– ENTER
State or Province Name (full name) []: <– ENTER
Locality Name (eg, city) [Default City]: <– ENTER
Organization Name (eg, company) [Default Company Ltd]: <– ENTER
Organizational Unit Name (eg, section) []: <– ENTER
Common Name (eg, your name or your server’s hostname) []: <– ENTER
Email Address []: <– ENTER
Configuring Jailkit
Configuring SASL
Configuring PAM
Configuring Courier
Configuring Spamassassin
Configuring Amavisd
Configuring Getmail
Configuring Pureftpd
Configuring BIND
Configuring Apache
Configuring Vlogger
Configuring Apps vhost
Configuring Firewall
Installing ISPConfig
ISPConfig Port [8080]: <– ENTER
Configuring DBServer
Installing ISPConfig crontab
no crontab for root
no crontab for getmail
Restarting services …
Restarting mysqld (via systemctl): [ OK ]
Restarting postfix (via systemctl): [ OK ]
Restarting saslauthd (via systemctl): [ OK ]
Restarting amavisd (via systemctl): [ OK ]
Restarting clamd.amavisd (via systemctl): [ OK ]
Stopping Courier authentication services: authdaemond
Starting Courier authentication services: authdaemond
Stopping Courier-IMAP server: imap imap-ssl pop3 pop3-ssl
Starting Courier-IMAP server: imap generating-SSL-certificate… imap-ssl pop3 generating-SSL-certificate… pop3-ssl
Stopping Courier-IMAP server: imap imap-ssl pop3 pop3-ssl
Starting Courier-IMAP server: imap imap-ssl pop3 pop3-ssl
Stopping Courier-IMAP server: imap imap-ssl pop3 pop3-ssl
Starting Courier-IMAP server: imap imap-ssl pop3 pop3-ssl
Stopping Courier-IMAP server: imap imap-ssl pop3 pop3-ssl
Starting Courier-IMAP server: imap imap-ssl pop3 pop3-ssl
Restarting httpd (via systemctl): [ OK ]
Restarting pure-ftpd (via systemctl): [ OK ]
Installation completed.
[root@server1 install]#
Der Installer konfiguriert automatisch alle unterstellten Dienste, Sie brauchen dies also nicht mehr manuell zu tun.
Sie können ISPConfig 3 anschließend unter http://server1.example.com:8080/ oder http://192.168.0.100:8080/ erreichen.
Loggen Sie sich mit dem Benutzernamen admin und dem Passwort admin ein(Sie sollten das Standartpasswort nach Ihrem ersten Login ändern):

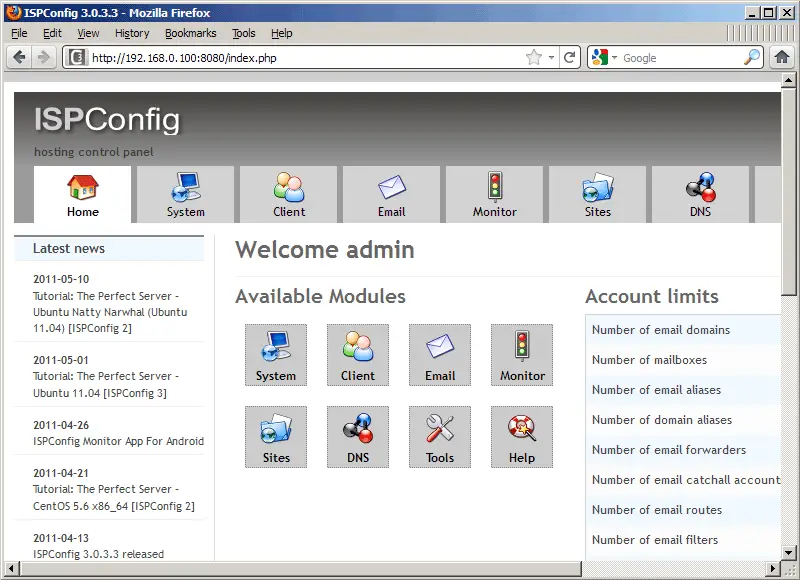
Sie haben das System nun fertig konfiguriert und es steht zur Benutzung bereit.The system is now ready to be used.
24.1 ISPConfig 3 Handbuch
Um den Umgang mit ISPConfig 3 zu beherrschen, empfehlen wir das ISPConfig 3 Handbuch herunterzuladen (bislang nur auf Englisch erhältlich).
Auf mehr als 300 Seiten beschreibt das Handbuch den Aufbau von ISPConfig und geht auf die unterschiedlichen Gruppen wie Admins,
Wiederverkäufer und Kunden ein. Es wird nicht nur beschrieben, wie man ISPConfig 3 installiert und aktualisiert, das Handbuch beinhaltet zusätzlich eine Referenz, in welchem alle Formularfelder mit Beispielen für mögliche Eingaben beschrieben werden. Für die gängigen Aufgaben in ISPConfig 3 werden ebenfalls detaillierte Anleitungen zur Verfügung gestellt. Ergänzend wird umfassend auf den Bereich der Serversicherheit eingegangen sowie eine ausführliche Fehlersuche bereit gestellt.
24.2 ISPConfig Monitor App für Android
Mit der ISPConfig Monitor App können Sie den Status Ihrer Server abrufen und nachsehen, ob alle Dienste wie geplant laufen. Sie können Ihre TCP und UDP ports kontrollieren und Ihren Server pingen. Zusätzlich können Sie die App benutzen um Details von Servern abzurufen, auf denen ISPConfig installiert ist (beachten Sie bitte, dass mindestens ISPConfig Version 3.0.3.3 installiert sein muss, um mit der Monitor App interagieren zu können!); diese Details beinhalten alles, was Sie vom Monitor Modul aus ISPConfig 3 gewohnt sind (z.B. Dienste, Mail- und Systemlogs, Mail queue, CPU und RAM Info, Speichergebrauch, Quota, OS Details, RKHunter log, etc.) und natürlich können Sie, da ISPConfig multiserverfähig ist, alle Server überwachen, die von Ihrem ISPConfig Master Server kontrolliert werden.
Den Download und die Gebrauchsanleitung finden Sie hier http://www.ispconfig.org/ispconfig-3/ispconfig-monitor-app-for-android/.
25 Links
- Fedora: http://fedoraproject.org/
- Network Device Naming: http://fedoraproject.org/wiki/Features/ConsistentNetworkDeviceNaming
- /run directory: https://docs.fedoraproject.org/en-US/Fedora/15/html/Release_Notes/sect-Release_Notes-Changes_for_SysAdmin.html
- tmpfiles.d: http://0pointer.de/public/systemd-man/tmpfiles.d.html
- ISPConfig: http://www.ispconfig.org/