Der Perfekte Server – Ubuntu 11.10 [ISPConfig 3]
19 Installation von fail2ban
Diese ist optional aber empfohlen, da der ISPConfig Monitor versucht, den fail2ban Log anzuzeigen:
apt-get install fail2ban
Um fail2ban PureFTPd, SASL und Courier überwachen zu lassen, erstellen Sie die Datei /etc/fail2ban/jail.local:
vi /etc/fail2ban/jail.local
[pureftpd]
enabled = true
port = ftp
filter = pureftpd
logpath = /var/log/syslog
maxretry = 3

[sasl]
enabled = true
port = smtp
filter = sasl
logpath = /var/log/mail.log
maxretry = 5

[courierpop3]
enabled = true
port = pop3
filter = courierpop3
logpath = /var/log/mail.log
maxretry = 5

[courierpop3s]
enabled = true
port = pop3s
filter = courierpop3s
logpath = /var/log/mail.log
maxretry = 5

[courierimap]
enabled = true
port = imap2
filter = courierimap
logpath = /var/log/mail.log
maxretry = 5

[courierimaps]
enabled = true
port = imaps
filter = courierimaps
logpath = /var/log/mail.log
maxretry = 5
Erstellen Sie dann die folgen fünf Filterdateien:
vi /etc/fail2ban/filter.d/pureftpd.conf
[Definition]
failregex = .*pure-ftpd: (.*@<HOST>) [WARNING] Authentication failed for user.*
ignoreregex =
vi /etc/fail2ban/filter.d/courierpop3.conf
# Fail2Ban configuration file
#
# $Revision: 100 $
#

[Definition]

# Option: failregex
# Notes.: regex to match the password failures messages in the logfile. The
# host must be matched by a group named "host". The tag "<HOST>" can
# be used for standard IP/hostname matching and is only an alias for
# (?:::f{4,6}:)?(?P<host>S+)
# Values: TEXT
#
failregex = pop3d: LOGIN FAILED.*ip=[.*:<HOST>]

# Option: ignoreregex
# Notes.: regex to ignore. If this regex matches, the line is ignored.
# Values: TEXT
#
ignoreregex =
vi /etc/fail2ban/filter.d/courierpop3s.conf
# Fail2Ban configuration file
#
# $Revision: 100 $
#

[Definition]

# Option: failregex
# Notes.: regex to match the password failures messages in the logfile. The
# host must be matched by a group named "host". The tag "<HOST>" can
# be used for standard IP/hostname matching and is only an alias for
# (?:::f{4,6}:)?(?P<host>S+)
# Values: TEXT
#
failregex = pop3d-ssl: LOGIN FAILED.*ip=[.*:<HOST>]

# Option: ignoreregex
# Notes.: regex to ignore. If this regex matches, the line is ignored.
# Values: TEXT
#
ignoreregex =
vi /etc/fail2ban/filter.d/courierimap.conf
# Fail2Ban configuration file
#
# $Revision: 100 $
#

[Definition]
# Option: failregex
# Notes.: regex to match the password failures messages in the logfile. The
# host must be matched by a group named "host". The tag "<HOST>" can
# be used for standard IP/hostname matching and is only an alias for
# (?:::f{4,6}:)?(?P<host>S+)
# Values: TEXT
#
failregex = imapd: LOGIN FAILED.*ip=[.*:<HOST>]

# Option: ignoreregex
# Notes.: regex to ignore. If this regex matches, the line is ignored.
# Values: TEXT
#
ignoreregex =
vi /etc/fail2ban/filter.d/courierimaps.conf
# Fail2Ban configuration file
#
# $Revision: 100 $
#

[Definition]

# Option: failregex
# Notes.: regex to match the password failures messages in the logfile. The
# host must be matched by a group named "host". The tag "<HOST>" can
# be used for standard IP/hostname matching and is only an alias for
# (?:::f{4,6}:)?(?P<host>S+)
# Values: TEXT
#
failregex = imapd-ssl: LOGIN FAILED.*ip=[.*:<HOST>]

# Option: ignoreregex
# Notes.: regex to ignore. If this regex matches, the line is ignored.
# Values: TEXT
#
ignoreregex =
Starten Sie fail2ban danach neu:
/etc/init.d/fail2ban restart
20 Installation von SquirrelMail
Um den SquirrelMail Webmail Client zu installieren, benutzen Sie:
apt-get install squirrelmail
Konfigurieren Sie SquirrelMail anschließend:
squirrelmail-configure
Sie müssen SquirrelMail sagen, dass Sie Courier-IMAP/-POP3 benutzen:
SquirrelMail Configuration : Read: config.php (1.4.0)
———————————————————
Main Menu —
1. Organization Preferences
2. Server Settings
3. Folder Defaults
4. General Options
5. Themes
6. Address Books
7. Message of the Day (MOTD)
8. Plugins
9. Database
10. Languages
D. Set pre-defined settings for specific IMAP servers
C Turn color on
S Save data
Q Quit
Command >> <– D
SquirrelMail Configuration : Read: config.php
———————————————————
While we have been building SquirrelMail, we have discovered some
preferences that work better with some servers that don’t work so
well with others. If you select your IMAP server, this option will
set some pre-defined settings for that server.
Please note that you will still need to go through and make sure
everything is correct. This does not change everything. There are
only a few settings that this will change.
Please select your IMAP server:
bincimap = Binc IMAP server
courier = Courier IMAP server
cyrus = Cyrus IMAP server
dovecot = Dovecot Secure IMAP server
exchange = Microsoft Exchange IMAP server
hmailserver = hMailServer
macosx = Mac OS X Mailserver
mercury32 = Mercury/32
uw = University of Washington’s IMAP server
gmail = IMAP access to Google mail (Gmail) accounts
quit = Do not change anything
Command >> <– courier
SquirrelMail Configuration : Read: config.php
———————————————————
While we have been building SquirrelMail, we have discovered some
preferences that work better with some servers that don’t work so
well with others. If you select your IMAP server, this option will
set some pre-defined settings for that server.
Please note that you will still need to go through and make sure
everything is correct. This does not change everything. There are
only a few settings that this will change.
Please select your IMAP server:
bincimap = Binc IMAP server
courier = Courier IMAP server
cyrus = Cyrus IMAP server
dovecot = Dovecot Secure IMAP server
exchange = Microsoft Exchange IMAP server
hmailserver = hMailServer
macosx = Mac OS X Mailserver
mercury32 = Mercury/32
uw = University of Washington’s IMAP server
quit = Do not change anything
Command >> courier
imap_server_type = courier
default_folder_prefix = INBOX.
trash_folder = Trash
sent_folder = Sent
draft_folder = Drafts
show_prefix_option = false
default_sub_of_inbox = false
show_contain_subfolders_option = false
optional_delimiter = .
delete_folder = true
Press any key to continue… <– ENTER
SquirrelMail Configuration : Read: config.php (1.4.0)
———————————————————
Main Menu —
1. Organization Preferences
2. Server Settings
3. Folder Defaults
4. General Options
5. Themes
6. Address Books
7. Message of the Day (MOTD)
8. Plugins
9. Database
10. Languages
D. Set pre-defined settings for specific IMAP servers
C Turn color on
S Save data
Q Quit
Command >> <– S
SquirrelMail Configuration : Read: config.php (1.4.0)
———————————————————
Main Menu —
1. Organization Preferences
2. Server Settings
3. Folder Defaults
4. General Options
5. Themes
6. Address Books
7. Message of the Day (MOTD)
8. Plugins
9. Database
10. Languages
D. Set pre-defined settings for specific IMAP servers
C Turn color on
S Save data
Q Quit
Command >> S
Data saved in config.php
Press enter to continue… <– ENTER
SquirrelMail Configuration : Read: config.php (1.4.0)
———————————————————
Main Menu —
1. Organization Preferences
2. Server Settings
3. Folder Defaults
4. General Options
5. Themes
6. Address Books
7. Message of the Day (MOTD)
8. Plugins
9. Database
10. Languages
D. Set pre-defined settings for specific IMAP servers
C Turn color on
S Save data
Q Quit
Command >> <– Q
Nun werden wir SquirrelMail so konfigurieren, dass man es aus einer (mit ISPConfig erstellten) Webseite heraus benutzen kann indem wir die /squirrelmail oder /webmail Aliases benutzen. Ist Ihre Webseite www.example.com, werden Sie in der Lage sein SquirrelMail durch www.example.com/squirrelmail oder www.example.com/webmail zu erreichen.
SquirrelMails Apache Konfiguration ist in der Datei /etc/squirrelmail/apache.conf, diese wird jedoch
nicht von Apache geladen, da sie sich nicht im /etc/apache2/conf.d/ Verzeichnis befindet. Deshalb erstellen Sie einen Symlink namens squirrelmail.conf im /etc/apache2/conf.d/ Verzeichnis, der zu /etc/squirrelmail/apache.conf zeigt und starten danach Apache neu:
cd /etc/apache2/conf.d/
ln -s ../../squirrelmail/apache.conf squirrelmail.conf
/etc/init.d/apache2 reload
Öffnen Sie nun /etc/apache2/conf.d/squirrelmail.conf…
vi /etc/apache2/conf.d/squirrelmail.conf
… und fügen die folgenden Zeilen zum <Directory /usr/share/squirrelmail></Directory> Container hinzu welche sicherstellen, dass mod_php zum Zugriff auf SquirrelMail genutzt wird, egal welchen PHP Modus sie in ISPConfig für Ihre Webseite ausgewählt haben:
[...]
<Directory /usr/share/squirrelmail>
 Options FollowSymLinks
 <IfModule mod_php5.c>
 AddType application/x-httpd-php .php
 php_flag magic_quotes_gpc Off
 php_flag track_vars On
 php_admin_flag allow_url_fopen Off
 php_value include_path .
 php_admin_value upload_tmp_dir /var/lib/squirrelmail/tmp
 php_admin_value open_basedir /usr/share/squirrelmail:/etc/squirrelmail:/var/lib/squirrelmail:/etc/hostname:/etc/mailname
 php_flag register_globals off
 </IfModule>
 <IfModule mod_dir.c>
 DirectoryIndex index.php
 </IfModule>

 # access to configtest is limited by default to prevent information leak
 <Files configtest.php>
 order deny,allow
 deny from all
 allow from 127.0.0.1
 </Files>
</Directory>
[...]
Erstellen Sie das Verzeichnis /var/lib/squirrelmail/tmp…
mkdir /var/lib/squirrelmail/tmp
… und lassen Sie den Benutzer www-data davon Besitz nehmen:
chown www-data /var/lib/squirrelmail/tmp
Laden Sie Apache danach neu:
/etc/init.d/apache2 reload
Das war es schon – /etc/apache2/conf.d/squirrelmail.conf definiert ein Alias namens /squirrelmail, das zu SquirrelMails Installationsverzeichnis zeigt /usr/share/squirrelmail.
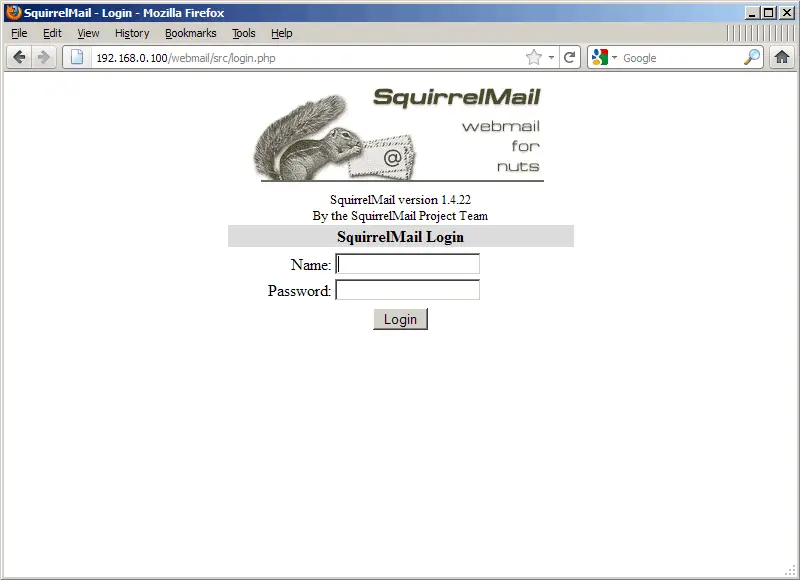
Sie können SquirrelMail nun folgendermaßen von Ihrer Webseite aus erreichen:
http://192.168.0.100/squirrelmail
http://www.example.com/squirrelmail
Sie können außerdem vom ISPConfig Control Panel vhost darauf zugreifen (nachdem Sie im nächsten Kapitel ISPConfig installiert haben)(dies bedarf keiner Konfiguration in ISPConfig):
http://server1.example.com:8080/squirrelmail
Möchten Sie das Alias /webmail anstatt von /squirrelmail benutzen, öffnen Sie einfach /etc/apache2/conf.d/squirrelmail.conf…
vi /etc/apache2/conf.d/squirrelmail.conf
… und fügen die Zeile Alias /webmail /usr/share/squirrelmail hinzu:
Alias /squirrelmail /usr/share/squirrelmail
Alias /webmail /usr/share/squirrelmail
[...]
Laden Sie dann Apache neu:
/etc/init.d/apache2 reload
Sie können nun auf den folgenden Wegen auf SquirrelMail zugreifen:
http://192.168.0.100/webmail
http://www.example.com/webmail
http://server1.example.com:8080/webmail (nachdem Sie im nächsten Kapitel ISPConfig installiert haben)
Würden Sie gerne einen vhost wie webmail.example.com anlegen über den Ihre Benutzer auf SquirrelMail zugreifen können, müssten Sie folgende vhost Konfiguration zu /etc/apache2/conf.d/squirrelmail.conf hinzufügen:
vi /etc/apache2/conf.d/squirrelmail.conf
[...]
<VirtualHost 1.2.3.4:80>
 DocumentRoot /usr/share/squirrelmail
 ServerName webmail.example.com
</VirtualHost>
Ersetzen Sie 1.2.3.4 mit der korrekten IP-Adresse Ihres Servers. Natürlich muss es einen DNS Record für webmail.example.com geben, der zur IP-Adresse zeigt, die Sie in Ihrer vhost Konfiguration benutzen. Stellen Sie außerdem sicher, dass der vhost webmail.example.com nicht in ISPConfig existiert (andernfalls werden beide vhosts einander behindern!).
Starten Sie nun Apache neu…
/etc/init.d/apache2 reload
… und Sie können SquirrelMail unter http://webmail.example.com erreichen!